Y'all, I am so excited about this. SO EXCITED! Know why?! Because this technique is so fun! And so easy! And so fun! Wait, did I say that already? I mean, it involves
glue. And
fabric paint. And
WATERCOLORS. I love watercolors.
Before you move on because the title basically gives everything away about how to do this (or not? Idk), I'm going to pique your curiosity by telling you something! This technique includes a
secret ingredient (of sorts)
! How exciting! So stay tuned, and I shall, in time, satisfy your ever growing curiosity.
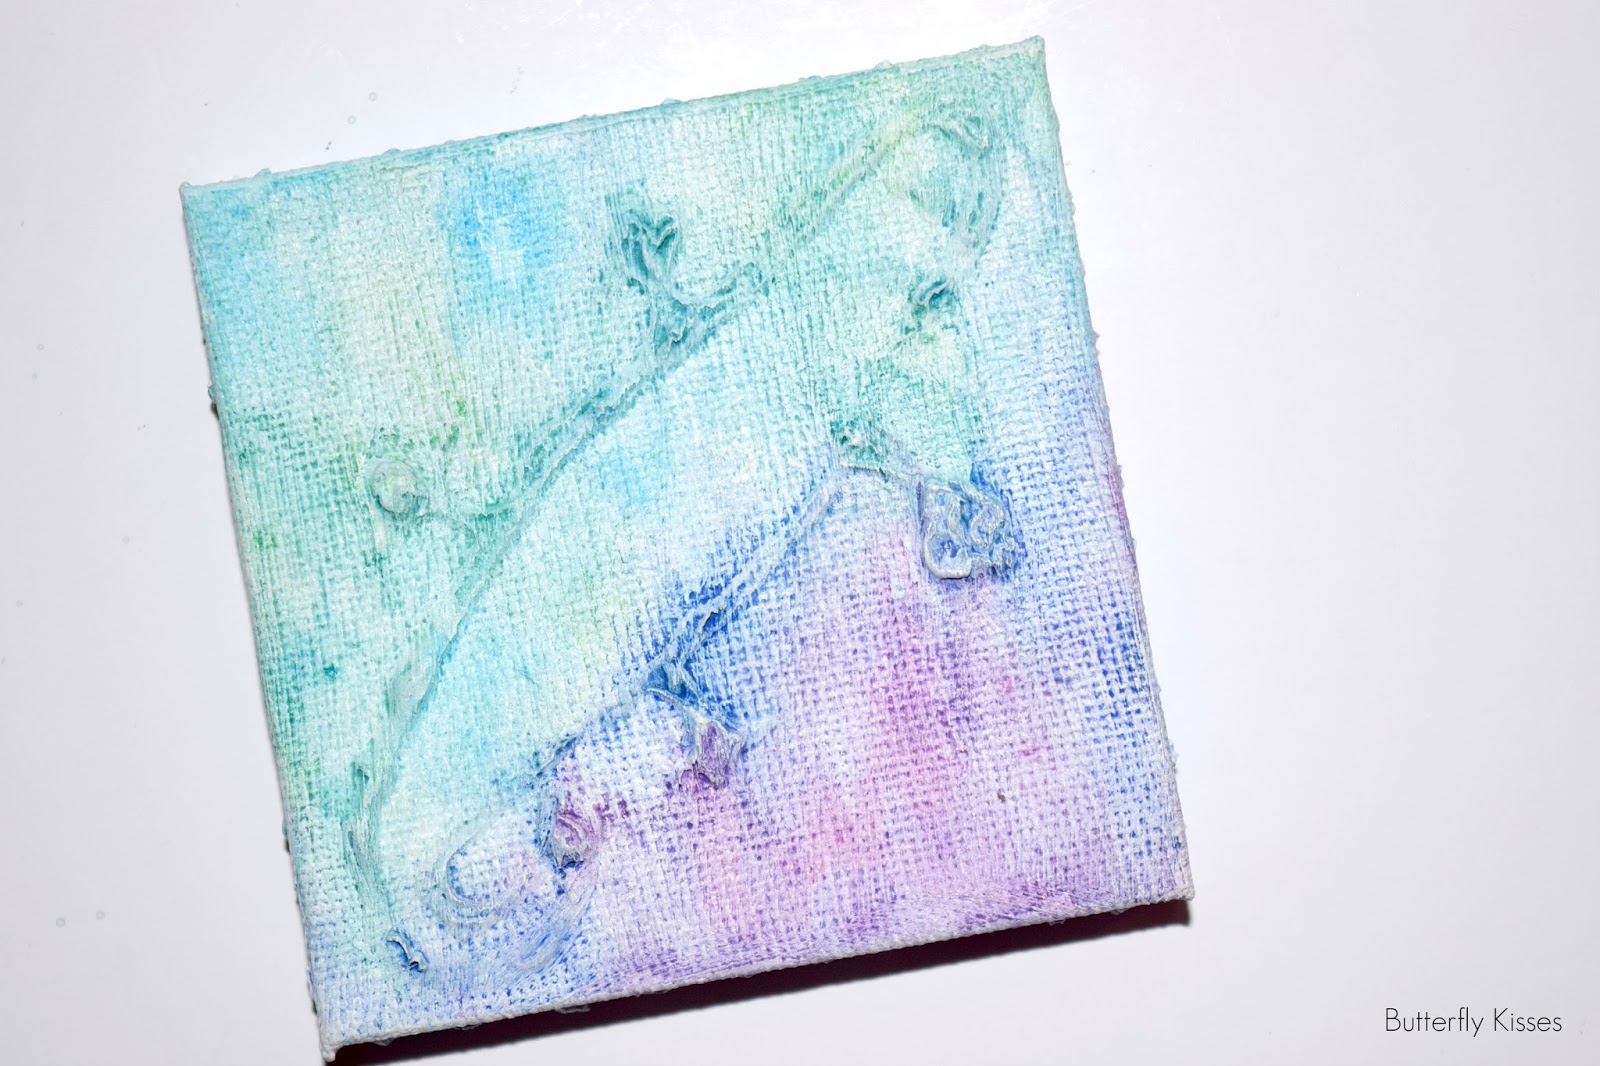
I tried this first on a
teeny! tiny! leetle! baby! canvas! I loved it so much that I HAD to try it on something bigger.* (And then
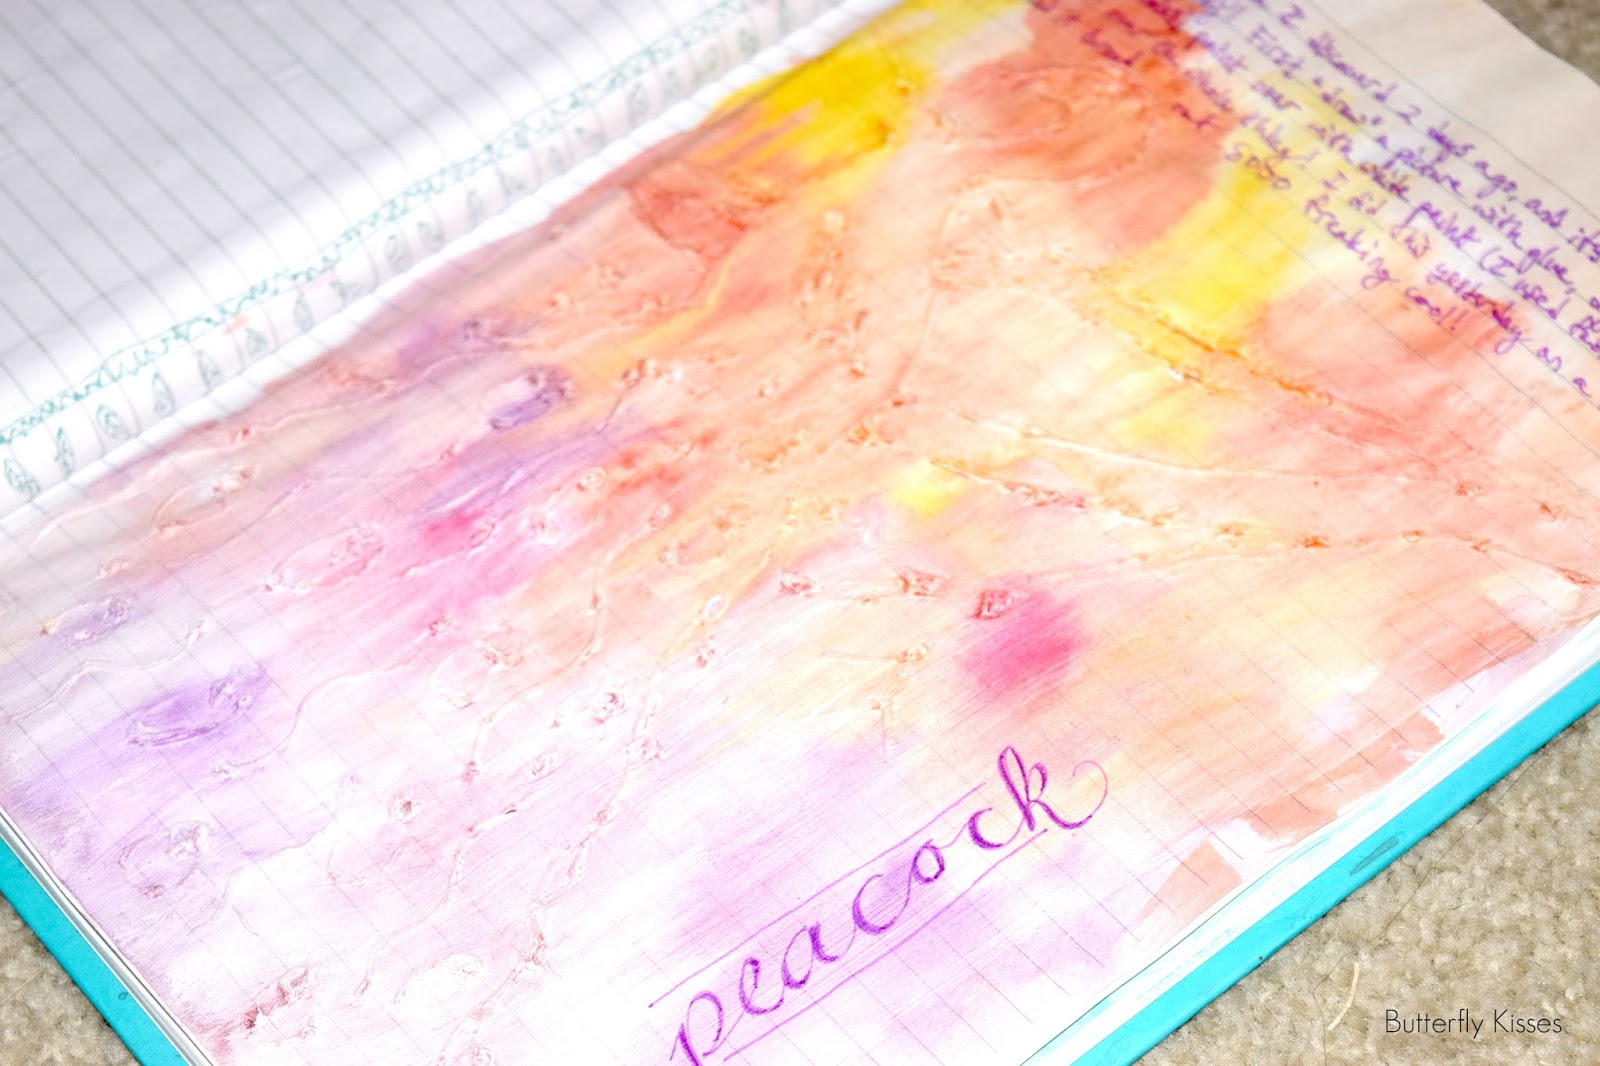
I tried it once more in my art journal, which was a fun experience!)
Look at that edge! LOOK LOOK LOOK! It's so cooool. So of course I gotta show y'all a bunch of pictures and show you how to do it yo'self!
*The bigger thing I tried it on was this long vertical canvas I had on hand already, back from when I bought it for when I was going to paint a peacock in art class, but then decided I wanted a bigger canvas for my peacock, so I bought a new one, and saved the smaller one for a later time! (Such a fun story, I know it.)
The first thing to be done for this super cool technique is to "draw" a simple picture with liquid glue.
For the
teeny! tiny! leetle! baby! canvas, I "drew" a lizard-type-thing, and for the one in my art journal, I "drew" a peacock. (Hopefully you could see that? I'm not sure if I would, except that I'm the artist! HA!) For this one, I "drew" dragonflies. Aren't they cuties?! You want to do relatively simple pictures, and as much as possible, thick, even squirtings of glue.
YAY I'M GONNA SATISFY YOUR EVER GROWING CURIOSITY NOW! It has come time to reveal the
secret ingredient. (Ooh, how exciting.) Can you see by the picture below? It's a heat tool!
Well now that you know the secret ingredient, I'll give you the list of supplies for this project.
Supplies
Canvas
Liquid glue
Heat tool (
this is the one I have)
White fabric paint (or acrylic paint)
Watercolors
Optional: acrylic sealer (I got mine at Walmart; I have both matte and gloss, but I used gloss for this.)
I got the bright idea to use a heat tool to dry the glue because 1) It was already sitting out from some other project I don't remember now, and 2)
Ain't nobody go time fo' dat! "Dat" being: waiting like
thirty. whole. minutes. for the glue to dry. Yeah, um, not gonna happen.
But guess what I found when I used the heat tool! I didn't know it would do this, and boy oh boy, I was
so excited when I saw it happenin'! It made the glue bubble up! You can see that better in the picture above than the one below.
I held the heat tool about two to three inches above the glue, and then waved it over the whole thing until it was all dry. It was such fun to see it bubble up like that! And then after it bubbled up, it would scrunch back down, and that's what gave it the nice texture, and that's why you need to put the glue on there pretty thick. If the glue isn't thick enough, it will dry before the heat gets to it, and it won't bubble up and scrunch back to provide that texture. The texture will really come in handy when we get to watercoloring.
On the edge of my dragonfly piece, I just did a simple squiggly line all around. This is an example of when I probably could have done the glue thicker. You can see that, even after drying with the heat tool, the glue looks pretty flat.
Now after it's all dry, it's time to paint over the whole thing with white fabric paint! I say fabric paint because that's all the white paint we had on hand when I was doing this project. You could totally use acrylic paint too. I'm sure they both work pretty much the same.
And I got out three bottles of the stuff because...I thought I'd need that much? Well I didn't. I only used one (the matte one, on the left, but it
probably doesn't matter which you use). The amount of glue I squeezed out (which you can see in the picture) was just about the perfect amount for my canvas.
With a good sized brush, hopefully acrylic, apply a good, thorough layer of paint over the whole canvas, making sure to get in all the little crevices. Funny story: the paintbrush in the pictures is not the one I ended up using to paint the whole thing. It's really better for watercolors than acrylics, so it wasn't stiff enough to do the job well.
See? Now it's all painted white! Just like it was already! Haha, okay but hopefully you can see the difference. I love the additional texture the paint strokes give.
YAY, this is my favorite part, and definitely the prettiest! Watercoloring!
Before I started on the front, I wanted to practice some on the back. Mostly I wanted to see what it looked like to watercolor right on the canvas, without the layer of fabric paint. It was nice, but I liked the way it looked better
with the fabric paint. It
would be cool to watercolor right on a canvas sometime, but that's another project for another time!
Alrighty, it's go time. Paint time. Play time. Whoooo! So first, just get your brush nice and soaking wet, and then get your canvas nice and soaking wet, and then apply some color on there! I am a
huge fan of lots of color, and also prettiness, so I like to use lots of pretty colors that coordinate well together.
At the top, I used light blue, turquoise, and light green, and then at the bottom, dark(ish) blue, purple, and dark(ish) pink. I tried to be careful not to mix them too much, but I did bring them together in a way that I think pleases the eye. It pleases
my eyes a whole lot. :) Try to be light and fluffy with your painting. Don't think about it too much, and don't try to make it perfect.
I also want to stress the importance of standing (or holding) the canvas in a vertical position and letting the paint drip down to the bottom. That's how all those awesome streaks happened. I couldn't have done that with my own skillz.
Aaahhh, doesn't it look awesome?! Notice how the color got caught in the groovy texture. That wouldn't happen as much if I hadn't let the paint drip downwards.
Aw, they're like BFFs. Too cute.
Oh yeah, don't forget to watercolor the sides.
The last thing I did was sign my work! Actually the last thing I did was seal my work. Before that I signed them. I just used sharpies in coordinating colors.
Ooh, and look at this! I even made this cool collage thingy for Pinterest! How fancy of me! Yeah, I
still haven't
put in the effort figured out how to add a Pin-it button to my images, but once
I pin it (which you can also do if you have the browser button), you can
stalk my little Pinterest, and get it fo' yo'self! (You should totally do it.)
And now
I'm the one whose curiosity is piqued: will you try this? I hope you do, and if you do,
please let me know and show me a picture, because I want to see how other people will take this and make it their own!
What picture would you "draw"?