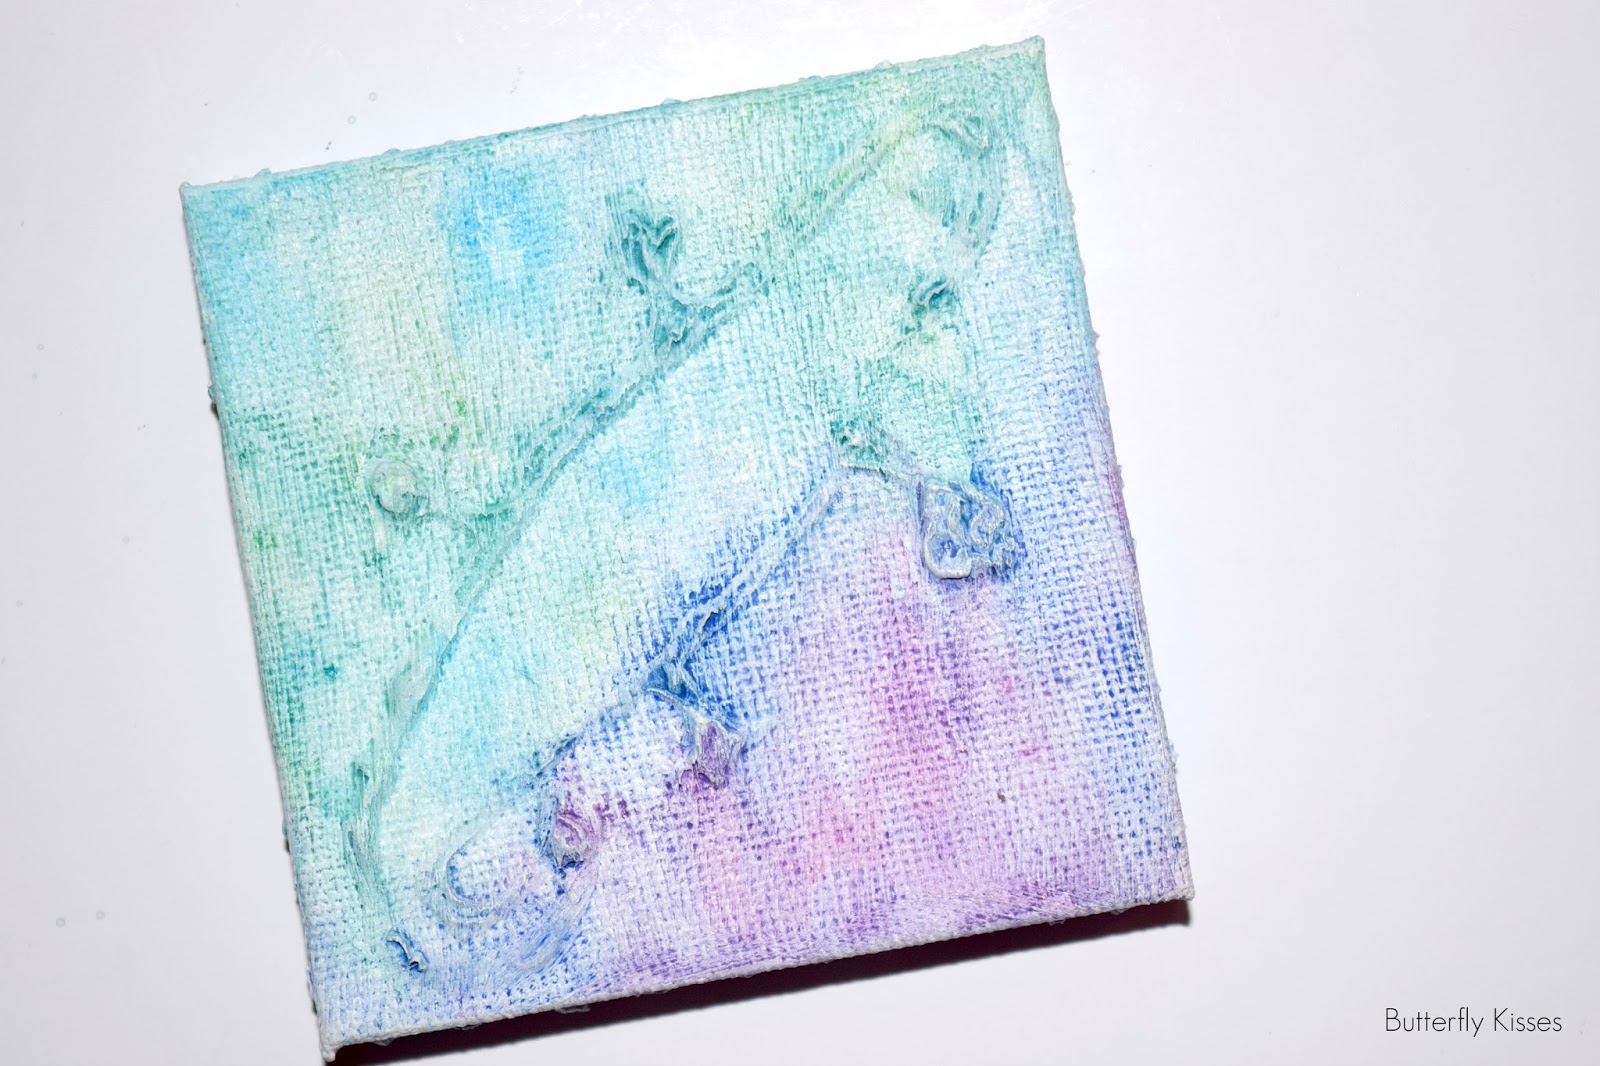
Showing posts with label Acrylics. Show all posts

Saturday, January 14, 2017

Wall Art // Using Glue, Fabric Paint, and Watercolors

Y'all, I am so excited about this.  SO EXCITED!  Know why?!  Because this technique is so fun!  And so easy!  And so fun!  Wait, did I say that already?  I mean, it involves glue.  And fabric paint.  And WATERCOLORS.  I love watercolors.

Before you move on because the title basically gives everything away about how to do this (or not?  Idk), I'm going to pique your curiosity by telling you something!  This technique includes a secret ingredient (of sorts)!  How exciting!  So stay tuned, and I shall, in time, satisfy your ever growing curiosity.
I tried this first on a teeny! tiny! leetle! baby! canvas!  I loved it so much that I HAD to try it on something bigger.*  (And then I tried it once more in my art journal, which was a fun experience!)
Look at that edge!  LOOK LOOK LOOK!  It's so cooool.  So of course I gotta show y'all a bunch of pictures and show you how to do it  yo'self!
*The bigger thing I tried it on was this long vertical canvas I had on hand already, back from when I bought it for when I was going to paint a peacock in art class, but then decided I wanted a bigger canvas for my peacock, so I bought a new one, and saved the smaller one for a later time!  (Such a fun story, I know it.)

The first thing to be done for this super cool technique is to "draw" a simple picture with liquid glue.
For the teeny! tiny! leetle! baby! canvas, I "drew" a lizard-type-thing, and for the one in my art journal, I "drew" a peacock.  (Hopefully you could see that?  I'm not sure if I would, except that I'm the artist!  HA!)  For this one, I "drew" dragonflies.  Aren't they cuties?!  You want to do relatively simple pictures, and as much as possible, thick, even squirtings of glue.
YAY I'M GONNA SATISFY YOUR EVER GROWING CURIOSITY NOW!  It has come time to reveal the secret ingredient.  (Ooh, how exciting.)  Can you see by the picture below?  It's a heat tool!

Well now that you know the secret ingredient, I'll give you the list of supplies for this project.

Supplies
Canvas
Liquid glue
Heat tool (this is the one I have)
White fabric paint (or acrylic paint)
Watercolors
Optional: acrylic sealer (I got mine at Walmart; I have both matte and gloss, but I used gloss for this.)

I got the bright idea to use a heat tool to dry the glue because 1) It was already sitting out from some other project I don't remember now, and 2) Ain't nobody go time fo' dat!  "Dat" being: waiting like thirty. whole. minutes. for the glue to dry.  Yeah, um, not gonna happen.
But guess what I found when I used the heat tool!  I didn't know it would do this, and boy oh boy, I  was so excited when I saw it happenin'!  It made the glue bubble up!  You can see that better in the picture above than the one below.
I held the heat tool about two to three inches above the glue, and then waved it over the whole thing until it was all dry.  It was such fun to see it bubble up like that!  And then after it bubbled up, it would scrunch back down, and that's what gave it the nice texture, and that's why you need to put the glue on there pretty thick.  If the glue isn't thick enough, it will dry before the heat gets to it, and it won't bubble up and scrunch back to provide that texture.  The texture will really come in handy when we get to watercoloring.

On the edge of my dragonfly piece, I just did a simple squiggly line all around.  This is an example of when I probably could have done the glue thicker.  You can see that, even after drying with the heat tool, the glue looks pretty flat.
Now after it's all dry, it's time to paint over the whole thing with white fabric paint!  I say fabric paint because that's all the white paint we had on hand when I was doing this project.  You could totally use acrylic paint too.  I'm sure they both work pretty much the same.

And I got out three bottles of the stuff because...I thought I'd need that much?  Well I didn't.  I only used one (the matte one, on the left, but it probably doesn't matter which you use).  The amount of glue I squeezed out (which you can see in the picture) was just about the perfect amount for my canvas.
With a good sized brush, hopefully acrylic, apply a good, thorough layer of paint over the whole canvas, making sure to get in all the little crevices.  Funny story: the paintbrush in the pictures is not the one I ended up using to paint the whole thing.  It's really better for watercolors than acrylics, so it wasn't stiff enough to do the job well.
See?  Now it's all painted white!  Just like it was already!  Haha, okay but hopefully you can see the difference.  I love the additional texture the paint strokes give.
YAY, this is my favorite part, and definitely the prettiest!  Watercoloring!
Before I started on the front, I wanted to practice some on the back.  Mostly I wanted to see what it looked like to watercolor right on the canvas, without the layer of fabric paint.  It was nice, but I liked the way it looked better with the fabric paint.  It would be cool to watercolor right on a canvas sometime, but that's another project for another time!
Alrighty, it's go time.  Paint time.  Play time.  Whoooo!  So first, just get your brush nice and soaking wet, and then get your canvas nice and soaking wet, and then apply some color on there!  I am a huge fan of lots of color, and also prettiness, so I like to use lots of pretty colors that coordinate well together.
At the top, I used light blue, turquoise, and light green, and then at the bottom, dark(ish) blue, purple, and dark(ish) pink.  I tried to be careful not to mix them too much, but I did bring them together in a way that I think pleases the eye.  It pleases my eyes a whole lot.  :)  Try to be light and fluffy with your painting.  Don't think about it too much, and don't try to make it perfect.
I also want to stress the importance of standing (or holding) the canvas in a vertical position and letting the paint drip down to the bottom.  That's how all those awesome streaks happened.  I couldn't have done that with my own skillz.
Aaahhh, doesn't it look awesome?!  Notice how the color got caught in the groovy texture.  That wouldn't happen as much if I hadn't let the paint drip downwards.
Aw, they're like BFFs.  Too cute.
Oh yeah, don't forget to watercolor the sides.
The last thing I did was sign my work!  Actually the last thing I did was seal my work.  Before that I signed them.  I just used sharpies in coordinating colors.
Ooh, and look at this!  I even made this cool collage thingy for Pinterest!  How fancy of me!  Yeah, I still haven't put in the effort figured out how to add a Pin-it button to my images, but once I pin it (which you can also do if you have the browser button), you can stalk my little Pinterest, and get it fo' yo'self!  (You should totally do it.)
And now I'm the one whose curiosity is piqued: will you try this?  I hope you do, and if you do, please let me know and show me a picture, because I want to see how other people will take this and make it their own!

What picture would you "draw"?

Saturday, August 27, 2016

How to Construct a Painted Bead Necklace at Eleven PM on a Saturday Night

July 9, 2016.  Eleven o'clock pm.  I'm in my room, about to take on a three and a half hour project: making a necklace to match my outfit for the next morning, and I haven't even showered yet.  Because when inspiration strikes, YOU'VE GOT TO GRAB IT BY THE NECK AND HOLD ON TIGHT AND NOT LET GO, because if you do, IT MIGHT LEAVE YOU FOREVER!  So I did not let go.  (But just so you know, I don't recommend staying up that late.  Especially on a Saturday night.)

I specifically wanted to make a necklace that would match my outfit in the morning, and there was no way I was going to postpone wearing that outfit to another day, because I already had it all picked out!  Do you know how much planning goes into picking out a Sunday outfit?  (Okay, actually this one didn't take much planning.  It was just a dress.)

Get yo' supplies!  My supplies included:
Pearly white beads, different sizes
Smallish rocks
Glass jar
Green acrylic paint (or whatever color you want)
Elmer's liquid glue (not pictured)
Clear stretch cord
Round acrylic paintbrush.
Toothpicks
Foam flower (not pictured)
Itty bitty glass beads in a color that goes with the paint

My supplies did NOT include:
White acrylic paint.  Why I put it in the picture, I don't know.  But give me a little grace here - it was like 11:30 by this point, probably.  I was tired.
The first* thing I did was to go outside and gather a few smallish rocks from the driveway.  I washed them off, and put them in a jar with the beads.  And...I SHOOK THAT JAR LIKE I MEANT IT!  Because I did mean it.

*Actually the first thing I did for this project was fiddle and tinker and mess around with different things to use for the necklace, until I found these beads, and was like, "Ah, perfecto!  I shall use them, with Rebecca's permission because they belong to her!"
But...apparently I shook it a little too hard.  The jar broke.
But!  The shaking worked, nonetheless!  I shook them a little more in another jar, gentler this time, and then they were ready.
All I had to do was peel the pearly white finish off of each. and every. individual. bead.  Noooo, not tedious at all!
After all the pearliness had been stripped away from those poor beads, I decided to shake them up with rocks one last time, to sand them.
Squirt!  Goes the paint.  Into the little white bowl thing.
Paint!  Goes the brush on the bead, which is on the toothpick.
Done!  Go all the little beads after they've been painted.
Alright, alright, alright (watch the video.  The whole thing, but especially 29 seconds in).  When they are all painted (and dry), mix together a wee bit of water with more than a wee bit of glue, and glaze every bead.  This is to minimize the chance that the paint will come off (refer to bottom of post for some important words on this topic).
The glue will take a bit longer to dry than the paint.  Ooh, and really important note here if you care about your brushes!  Please please please wash out all of the glue from your brushes!  Even if you don't care about your brushes, do it because I care about your brushes!
Because gravity is a thing, the glue will drip to the bottom, so there will be wet glue at the bottom of the bead, while the top is dry.  Like this:
In order to keep the glue from drying on the toothpick (and peeling off when you remove the bead), you'll want to flip the bead over before the glue spot at the bottom dries.  Like this:
HEY!  Would you look at that!  After only, like, two hours or something, the beads are done!
Now we've got to string them onto the elastic string.  Cut the elastic to whatever length you want.
It took me a long time and many tries to get a pattern of beads that I liked, because there were two sizes: big, and smaller than big (as you can see from the picture up yonder).  I wanted it to look random, but also consistent.  (I'm a woman - I'm hard to please.)
Playing around with a favorite letter of mine*...
*I'm not saying it is my favorite letter.  I don't think I have a favorite.  But obviously it's gonna be one of my favorites.

After all that, the necklace wasn't long enough with only the painted beads, so, for like the tenth time, I took them off the elastic (but made sure they stayed in the right order), and I put a little bitty glass bead in between each painted bead.
A note about these glass beads: aren't they pretty?  And also, see how they're not the same color as the painted beads?  This at first irked me, but they were the the best option of all the glass beads my sister owned,* and as it turned out, it worked quite well since the dress I wore the next day had many colors.

*I don't make jewelry.  I don't own beading supplies.  My sister doesn't often make jewelry either. But she has beading supplies.
Once there was a little bead between each painted bead, I still wanted it longer, so I added more little beads on the ends.
I added about two inches of little beads on each end.
When it was as long as I wanted it, I slipped one end of the elastic through one side of the hole in a little bead, and the other end of elastic through the other side of the same hole.  Like this:
Then I pulled it tight and knotted it.  I realized after wearing it the next day, that I should have pulled the elastic tighter.  I didn't want to pull it tighter and stretch it out, but it was going to stretch out anyway, by hanging around my neck.  So pull it tighter than you think you need to.
I knotted it a couple more times, than snipped off the leftover elastic!
I have this other necklace that I did not make, that I thought would look good paired with my homemade necklace.  I ended up just wearing the other necklace as a bracelet instead, but still, they look pretty snazzy togever.
So fashionable.  While I'm bragging about its fashionableness, I suppoooose I should also tell you about something not so grand.  Being, I wore the same outfit to my cousin's wedding last weekend, and ALAS!  When I was unpacking from the trip, I noticed to my VERY GREAT dismay that the paint been *gasp* dare I say?  ScerATCHED from some of the beads!

Needless to say, I was PUT.  OUT.  Yes, it pains me to tell you.  Probably it never would have happened if I was carefuller in how I packed them.  So just keep that in mind if you make this necklace, and pack it carefully!
So tell me, lovely ladies of the world, would you wear this?  Have any tips for sealing it so it won't get scratched?  What color would you paint it?

P.S.  If you noticed that there are three places in this post where there should be a space, know that I know, and it bothers me to death too, but it won't let me add spaces there!  If you know what's going on and how to fix it, plz holp.