All the way back in August, I mentioned doing a blog post on this card soon, because I used the same punch on that card as I'm using for this card, although how I used it differs from how I will use it here. Although it is now too late to be called soon.
Here is the card when I first made it for my friend. I love to have the words "love you" on cards. However, since this card is mostly white and looks sort of lacy, I thought it would also work fantastically as a wedding thank you card! The only thing you would have to change is which words you use. All the words I used are from Tim Holtz Celebration Words Script dies, which are super fun.
I realized after cutting the paper for the new pair of cards, that I did them a different size than the original (above) card. I decided to just go with it. You choose which you like better (personally, I like the first better). The first card was 4-1/2 by 4-1/4 inches, so there wasn't any un-punched space around the edges. The second was 5 by 4-1/4 inches. Of course, that's after they're folded, so you would cut the paper to 8-1/2 (two times 4-1/4) by 4-1/2 or 5 inches, and then fold it in half with those expert skillz you possess. The overlay paper (as I will call it) should be the size of the card when it's folded.
The pictures basically tell you how to make this card, so my words will be kept at a minimum, but I shall add some in there when the going gets tough. Such as...this below picture is simply of the cards and overlay paper before getting all fancied up.
Position the overlay paper on the bottom part of the punch. This part may be a little tricky, only because you have to get it in the center as much as possible, without any exact way to do it. Hopefully you're not super perfectionist-y like a certain someone called me. It's really not that hard to do though.
This picture actually has no purpose. I just like how it looks!
Make sure you hold the paper firmly when you put the top of the punch down, or else the paper could move. The magnets are pretty strong. (Okay, so maybe I'm adding in more words than I anticipated.)
Here you can see how the guides can help you punch multiple times without just guessing where to put the paper, and then horribly messing up. I mean...not that you would do that...haha, of course you wouldn't... But I would! So guides are quite helpful.
All punched up and perdy! In the original, there was no space on the top or bottom, and I really think it looked better.
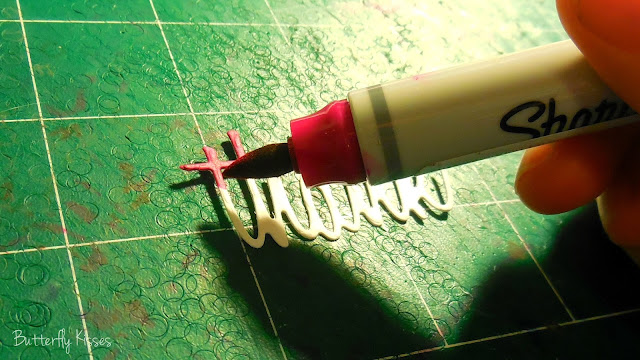
It's not completely necessary, but it's much easier to color in the words if you use a brush tip sharpie instead just a regular thick sharpie. Haha, or you could simply die cut out of actual colored paper. That's an option too.
Hope y'all enjoyed this tutorial!


These are so pretty!
ReplyDeleteHonks Kay Buff!
DeleteWoa! Those are amazing!!!!!
ReplyDeleteWell thank you Elyse! So glad you think so!
DeleteThis is so beautiful and creative. Love your blog <3
ReplyDeleteLorraine // Laurel Crowned
Thanks so much, Lorraine! I've seen you around, but I haven't checked out your blog yet, until now, that is. :)
DeleteThis is so beautiful and creative. Love your blog <3
ReplyDeleteLorraine // Laurel Crowned