The centerpiece of this card had been sitting on my desk for, literally, months, before I finally got around to making the card! (In fact, I think I created this centerpiece around the same time I made
this card, and I used the same sharpie for both!) (I go through extra-fine back sharpies rather quickly.) I was playing around with fonts and cheesy but sweet sentiments, and this is what I came up with. I wanted to make a card that would be just as lovely, because this was somethin' special here!
As it turns out, the card I made with it was not my best, and if I could go back and remake the card, I would do it a bit differently, but you know what? IT'S OKAY! I still love the sentiment.
Supplies
Doily
Scissors
Sharpies (multiple shades and thicknesses of one color, + an extra-fine black sharpie)
Baker's Twine
Glue
Card
So first, we're going to start with a doily, like we've used many times before. Now look at the doily. It has ten sides, see? So we're going to cut it into ten little triangles. You'll cut from the "1" to the "6," the "2" to the "7," and so on.
After you cut the doily in half the first time, you'll need to hold the two halves together as you cut it in half another way.
Then you can use the pointy middle to make sure you're cutting it straight through...the middle! (Do I make sense? Me thinks not. So this is where you refer to the picture.)
There, ten little triangles!
Get out your trusty sharpies, and draw some horizontal lines on those triangles! I used five sharpies, and did two triangles per sharpie, drawing the horizontal lines opposite ways for the two (except I accidentally did the lines the same way for those two on the right). Can you tell which sharpies I used for which triangles?
It makes a pretty good stack of colored triangles. We'll only use four of them today, so you can stash the others away somewhere. (My extras are still...ahem...on my desk.)
Yay, baker's twine! This stuff is so pretty, don't you think?
I got this idea from
this pin I saw on Pinterest, but wanted a little something more, and that's why I added the stripes. Eep, this is so pretty! Set this aside for latah.
I already had my centerpiece made when I got around to making this card, so I didn't take pictures of it as I drew/wrote it, but you probably don't have one yet! If you're nervous about trying fancy typography, you don't have to try it! You could totally just use your regular old handwriting, or, if you want, you may be able to find a stamp with a similar sentiment that you could use. But it is really fun to experiment with hand-lettering.
If you would like to try hand-lettering, you should check out Jennie's post on the subject!
After you get it written, you can cut it out in an oval shape. I used a stencil.
Now all the elements are made, and all we have to do is figure out how the card will be layed out. This was my first idea. I actually really like this, but I nixed it because I wanted to include a bow, and there didn't seems to be a place for a bow with this layout. Also I would have had to cut off parts of the triangles, which I didn't want to do.
So I played around a bit more, and came up with this. As you can see, there are now only four triangles visible.
Now that it's decided, we can begin to glue everything down permanently. But first, I wanted to knot the ends of the string, to kind of give the impression that it's hanging up.
After the ends are tied, put a little glue under each knot, and let dry. Don't try to do anything else until they're dry, because the string will move from the glue very easily before it's dry. And if that happens, you just might go
crazayyy!
Alright, cool. The glue under the knotted string is dry now. (That was quick!) So now you can glue down the triangles. Which, surprisingly, can be a little tricky. Because you want them to be at exactly the right place so that the centerpiece will be right in the middle of them. I kind of had to maneuver them into place until they were right.
Then when they're all behaved and glued down and dried, you can glue down the centerpiece. As the catchy commercial goes, "Push it REAL good!" Meaning, push that centerpiece down. Keep it calm. Give it a nice long back rub.
There we go! All the main elements are glued on! (What do you think of it at this point?)
I was not satisfied at that point, so I added some outlining lines. I'm not sure I really like the look of it, but you know what? IT'S OKAY!
I knew it needed a bow the whole time (remember what I said up ther'?), and finally! The chance came! I made a pretty little bow from the baker's twine used for the doily triangles. (Hey, did you knooow, there's actually a fancy name for that, other than doily triangles? It's called
bunting. Yes, I do know words sometimes.) Maybe someday I will show you people how to make one of these perfect bows, but alas! Today is not the day.
Then I
still thought it needed somethin' more, specifically, black adhesive pearls, which I do not own. So, I just drew some, which do not look near as classy, but you know what? IT'S OKAY!
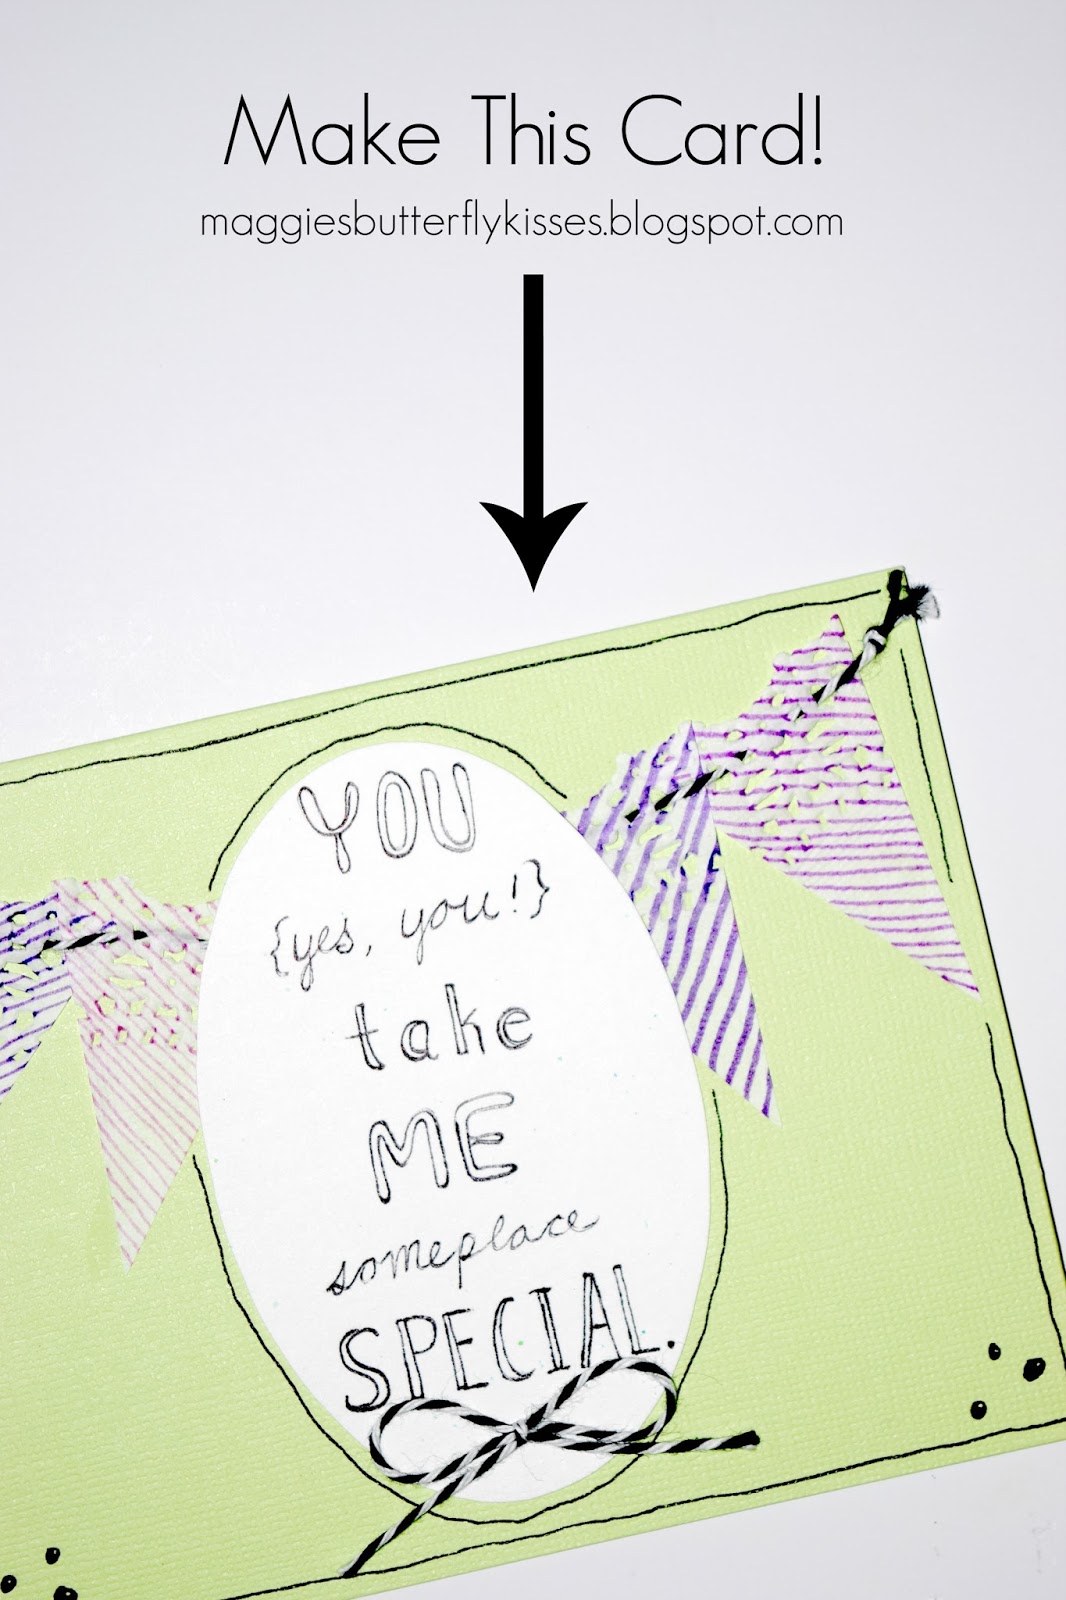
There we go! It's all done!
Whew!
The finished card!
What do you think of the sentiment? Do you think it's cute as can be, or plain cheesy?


Both the card and the sentiment are adorable!! I love it! :D
ReplyDeleteAw, thank you Mary Evelyn! :D
DeleteSUCH A LOVELY CARDDDDD
ReplyDeleteWWHAAA REALLY VANESSA? Well thank you so much!
DeleteBunting and bows are two things I seem to use a lot in card making, and enveloped embellishing and everything, so obviously, I like this card! I think your drawn 'pearls' really finish it off nicely. :)
ReplyDeleteThey're both so cute, aren't they? Well thank you Jessica! Haha, I'm glad you approve of my drawn 'pearls'. ;)
DeleteHi Emma! That sounds familiar...oh yeah, you had that craft blog, I remember! So I do remember that you were into crafts at least. You should definitely give this card a try, and definitely get some doilies! I've used them for so many cards. Thanks for the comment!
ReplyDelete