Showing posts with label Baker's Twine. Show all posts

Tuesday, October 18, 2016

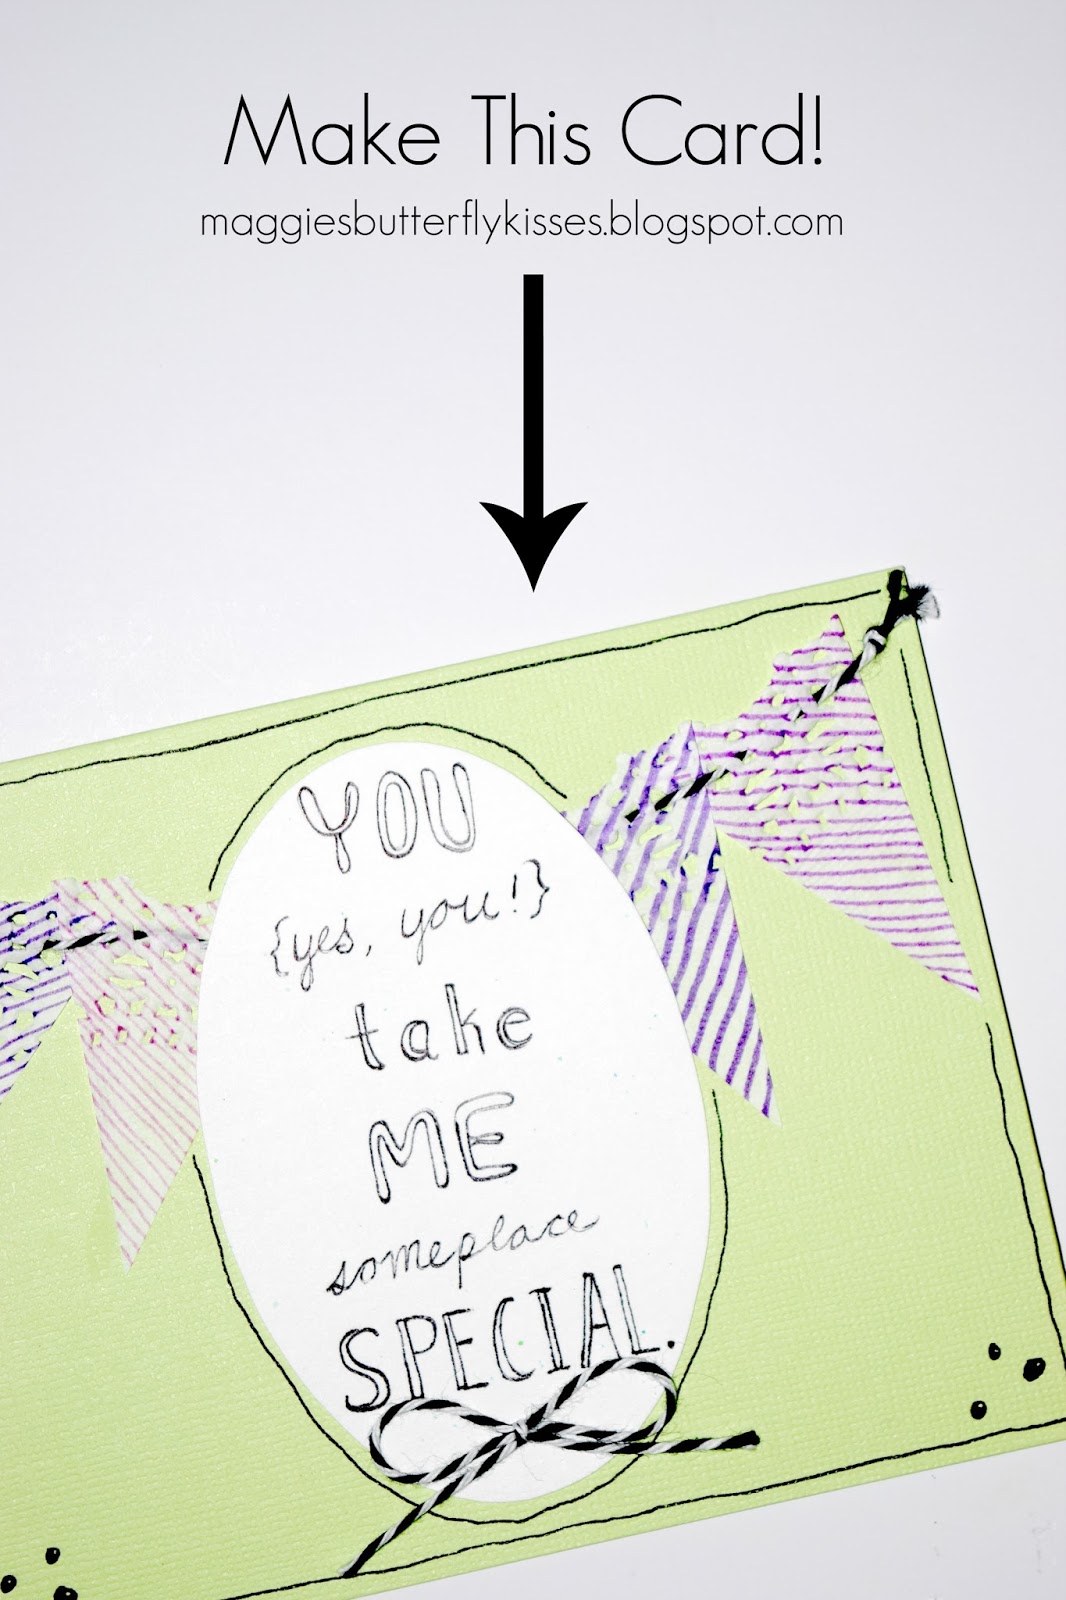
Card Tutorial // You (Yes, You!) Take Me Someplace Special.

The centerpiece of this card had been sitting on my desk for, literally, months, before I finally got around to making the card!  (In fact, I think I created this centerpiece around the same time I made this card, and I used the same sharpie for both!)  (I go through extra-fine back sharpies rather quickly.)  I was playing around with fonts and cheesy but sweet sentiments, and this is what I came up with.  I wanted to make a card that would be just as lovely, because this was somethin' special here!

As it turns out, the card I made with it was not my best, and if I could go back and remake the card, I would do it a bit differently, but you know what?  IT'S OKAY!  I still love the sentiment.
Supplies
Doily
Scissors
Sharpies (multiple shades and thicknesses of one color, + an extra-fine black sharpie)
Baker's Twine
Glue
Card

So first, we're going to start with a doily, like we've used many times before.  Now look at the doily.  It has ten sides, see?  So we're going to cut it into ten little triangles.  You'll cut from the "1" to the "6," the "2" to the "7," and so on.
After you cut the doily in half the first time, you'll need to hold the two halves together as you cut it in half another way.
Then you can use the pointy middle to make sure you're cutting it straight through...the middle!  (Do I make sense?  Me thinks not.  So this is where you refer to the picture.)
There, ten little triangles!
Get out your trusty sharpies, and draw some horizontal lines on those triangles!  I used five sharpies, and did two triangles per sharpie, drawing the horizontal lines opposite ways for the two (except I accidentally did the lines the same way for those two on the right).  Can you tell which sharpies I used for which triangles?
It makes a pretty good stack of colored triangles.  We'll only use four of them today, so you can stash the others away somewhere.  (My extras are still...ahem...on my desk.)
Yay, baker's twine!  This stuff is so pretty, don't you think?
I got this idea from this pin I saw on Pinterest, but wanted a little something more, and that's why I added the stripes.  Eep, this is so pretty!  Set this aside for latah.
I already had my centerpiece made when I got around to making this card, so I didn't take pictures of it as I drew/wrote it, but you probably don't have one yet!  If you're nervous about trying fancy typography, you don't have to try it!  You could totally just use your regular old handwriting, or, if you want, you may be able to find a stamp with a similar sentiment that you could use.  But it is really fun to experiment with hand-lettering.  If you would like to try hand-lettering, you should check out Jennie's post on the subject!

After you get it written, you can cut it out in an oval shape.  I used a stencil.
 Now all the elements are made, and all we have to do is figure out how the card will be layed out.  This was my first idea.  I actually really like this, but I nixed it because I wanted to include a bow, and there didn't seems to be a place for a bow with this layout.  Also I would have had to cut off parts of the triangles, which I didn't want to do.
 So I played around a bit more, and came up with this.  As you can see, there are now only four triangles visible.
Now that it's decided, we can begin to glue everything down permanently.  But first, I wanted to knot the ends of the string, to kind of give the impression that it's hanging up.
After the ends are tied, put a little glue under each knot, and let dry.  Don't try to do anything else until they're dry, because the string will move from the glue very easily before it's dry.  And if that happens, you just might go crazayyy!
Alright, cool.  The glue under the knotted string is dry now.  (That was quick!)  So now you can glue down the triangles.  Which, surprisingly, can be a little tricky.  Because you want them to be at exactly the right place so that the centerpiece will be right in the middle of them.  I kind of had to maneuver them into place until they were right.
Then when they're all behaved and glued down and dried, you can glue down the centerpiece.  As the catchy commercial goes, "Push it REAL good!"  Meaning, push that centerpiece down.  Keep it calm. Give it a nice long back rub.
There we go!  All the main elements are glued on!  (What do you think of it at this point?)
I was not satisfied at that point, so I added some outlining lines.  I'm not sure I really like the look of it, but you know what?  IT'S OKAY!
I knew it needed a bow the whole time (remember what I said up ther'?), and finally!  The chance came!  I made a pretty little bow from the baker's twine used for the doily triangles.  (Hey, did you knooow, there's actually a fancy name for that, other than doily triangles?  It's called bunting.  Yes, I do know words sometimes.)  Maybe someday I will show you people how to make one of these perfect bows, but alas!  Today is not the day.
Then I still thought it needed somethin' more, specifically, black adhesive pearls, which I do not own.  So, I just drew some, which do not look near as classy, but you know what?  IT'S OKAY!
There we go!  It's all done!  Whew!
The finished card!
What do you think of the sentiment?  Do you think it's cute as can be, or plain cheesy?

Saturday, June 18, 2016

How to Put Together a Simple Girly Birthday Gift {For a Girl of Any Age!}


It's almost summer.  Which means, in our family, it's birthday season.  And birthday season means lots of cake.  OH OH and also lots of gifts to give!

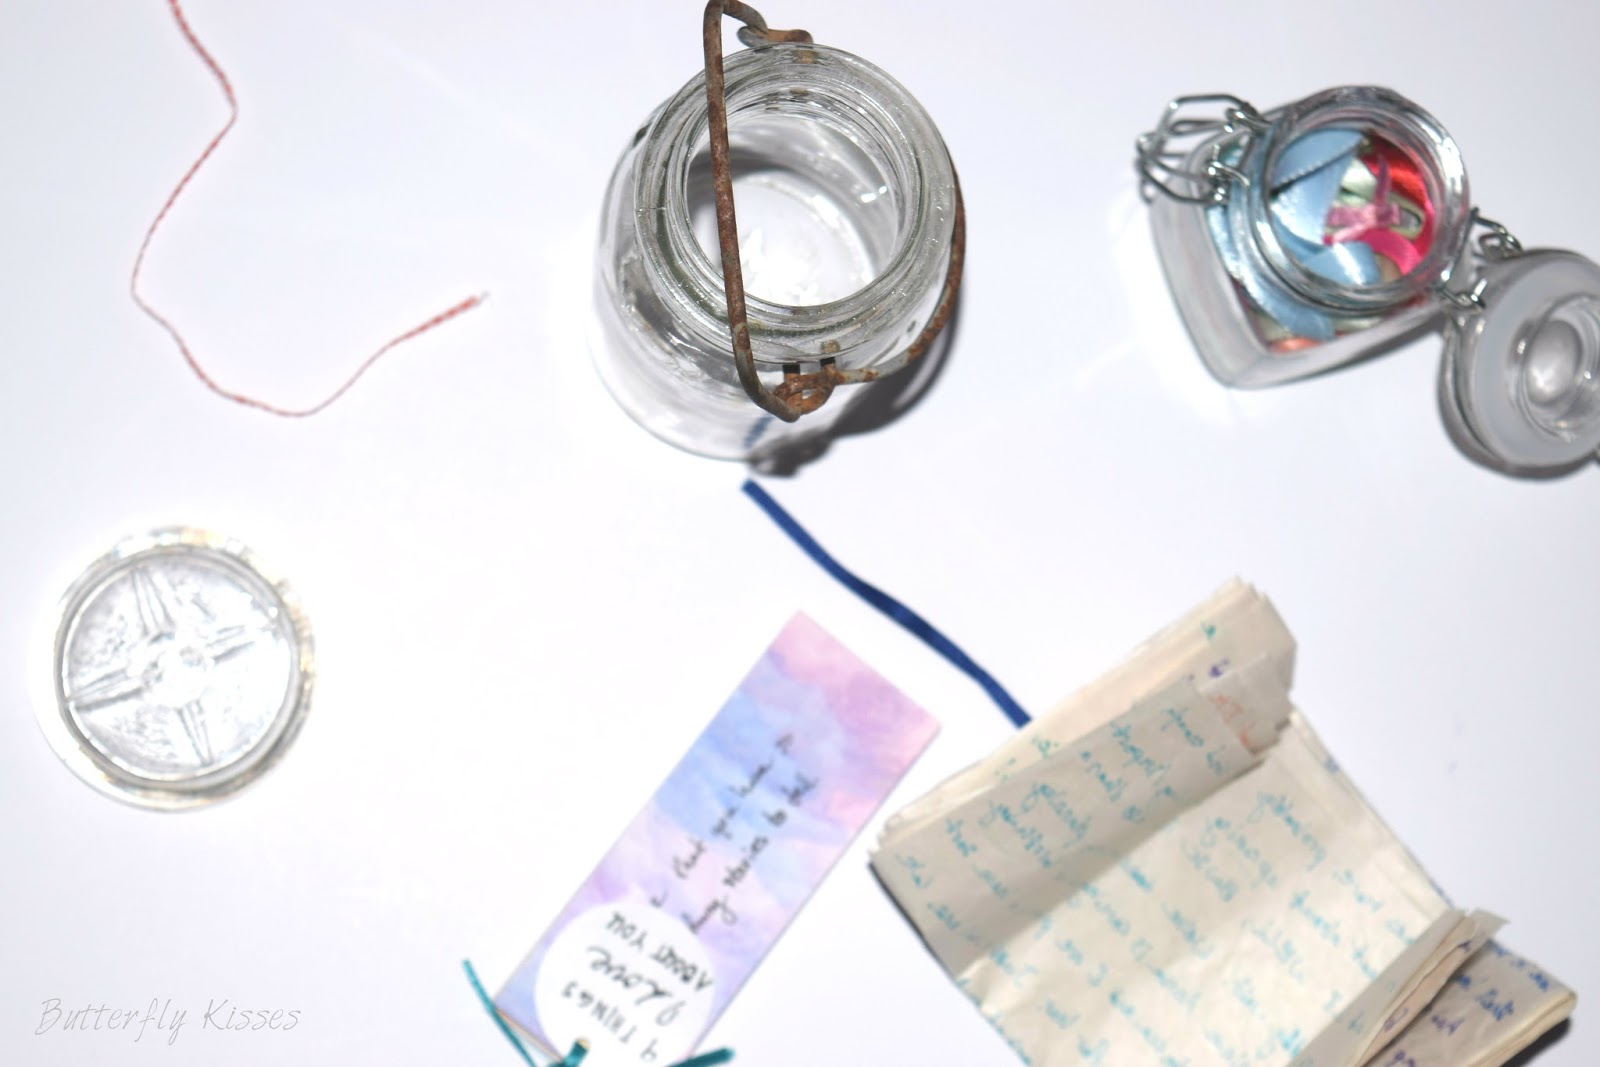
One of my sisters is somewhat hard to get gifts for, so you know what I did?  Well, I went straight to Thinking Outside the Giftbox by Lauren Lanker, and when I was done, I had several ideas to pick from!  I decided to use two, and put them together to make a cute gift in a jar.  Or a glass.  Or whatever you call this cool looking thing that came from a building in our woods.  What do you call it?  (Ooh, and it even has this cool glass top with four points that look like the points of a compass!  Coooool.)
The two gifts I ideas I chose were a "10 Things I Love About You" booklet, and a plain ol' letter, because everyone loves letters!  The "10 Things I Love About You" booklet was not originally Lauren's idea; she borrowed it from Ashley at The Creative Place.  It's such a simple idea, and yet so special!

Instead of using the printable, I decided to just make my own from scratch.  So I painted on watercolor paper, and used that as my "canvas."
I didn't do 10 things actually.  I did 9, only because, with the size of the paper I was using, it worked perfectly to cut it into 9 sections.  There are certainly more than 9 things I love about my sister!
 I hole punched and fancily numbered each one.
Now this is the fun part - writing out what you love about your person!  (JK, all of it is the "fun part.")  Lauren said in her book that the ones she and her husband made for their moms were so specific that they couldn't be said of the other.  That's what I tried to shoot for.  The more specific, the more specialific!
This is the tag I made to attach on the front.  It's just white cardstock and black sharpie.


I have this little jar of ribbon that is just! so! fun!  Actually I have three matching jars of ribbon!  One of them contains lots of thin, pretty, colorful ribbons, and it is where I fetched the beautiful teal ribbon used for the booklet.
You could tie it like this, with a long tail....
 ...Or you could tie it with a pretty bow like this, which is how I ended up doing it.
I wanted the letter to be fun and colorful too, so I wrote it on this cool, wrinkled, old looking paper I had, with all different colors of sharpie.
Since I write long letters, and since I couldn't write on both sides of the paper because the sharpie bled through, the letter ended up being two pieces of paper long.  Which I like.
Now the construction of each of the gifts is completed, and all we have to do is package them up!  That's one of my favorite parts.
I wrapped a ribbon around the letter so it's all nice and compact, and it fits in the jar.
Now, just because the making of the gifts is done, that doesn't mean the making is done!  Time to make confetti!  (That's part of packaging up, right?)  I have these cool fringe scissors that are perfect for this.  I used hot pink, light pink, and light blue tissue paper, and just cut it into about inch-long strips.
Now, just because the confetti making is done, doesn't mean the making is done!  Oh no!  We still have a tag to make for the jar!  Actually though, this tag was pre-made when I put this gift together.  Yes, it was pre-made by me, but still, pre-made.  So all I had to do was punch a hole and write on it.
Out of the same jar of ribbon as I fetched the teal ribbon from, I pulled this pretty green ribbon.  It happens to be the same ribbon I used for The Little Green Bow, if anyone remembers that!
Alright, now the making is finally done, and we can put the gift together!
First I put in the confetti.  Then the booklet and letter went in together, and on top of that, the top!
Don't you just love how old and antique-y this jar looks?
And the top is so cool.
As I said in the title of this post, you could do this for a girl of any age, and she'll love it!  I'm sure you could easily tweak this also to be a good guy's gift.  But...probably only if he's your sweetie or your brother.  Or your dad.

Who, in your life, could you make something like this for?

{P.S. Linking up here!}

Saturday, February 13, 2016

Although I Don't Like the Number Four...

Although I don't like the number four, it seems I can't get away from it at times.  This post will feature four different mediums that will all be combined on one card.

Remember how I hinted in my last post about an upcoming post that I was super excited about?  Well guess what.  IT'S HERE.
Now, I am fully aware that this might not be as exciting for some of y'all as it is for me.  Fully aware, meaning, I am keeping that as a possibility in my brain, whether or not I understand how that could be the case.

Granted, I get excited quite easily about cool artsy techniques, but I am hoping that SO DO YOU!  Because this technique is really cool.
Watercolors lately have been one of my many loves.  Not for painting pictures with so much (though that is lovely too), but simply for painting pretty little background/centerpieces to use on cards.  This pink piece specifically is something I made a couple weeks ago, to use on a Valentine's Day card (which I still have not done).  It was my first time combining all four mediums like this, and I was so happy with the result that I had to try it again and show y'all!


Sharpie
Here are the first two mediums we'll be using.  A sharpie and a crayon, in the colors shown, but of
course you can use whatever colors your heart desires!  OH HEY.  I has a question called: can writing utensils even be called mediums?  I feel like they're not supposed to be called that, but I've been doing it, and I do believe I will continue.  Because I am a rebel like that.  (Tell me in the comments whether or not you think it's okay.  I'm curious.)


So, obviously, since we'll be using watercolors later, you'll need to be working on watercolor paper.  I used a smallish piece, like half the size of a card, but the size doesn't really matter.

I wrote "Happy Birthday" on mine because I needed to make a bunch of birthday cards, and in my opinion, birthdays trump Valentine's Day.  I would have done Valentine's Day if I didn't need to make a birthday card instead.  I'm thinkin' this would be super cute for Valentine's Day though.  You should try it and show me your beautimous work.
I was intending at first to write it basically the same curly way as the pink piece, but apperently, my hand had other ideas. So this is what happened.  You can do any font you like; just make sure your letters are wide enough so that you can paint inside them later with acrylic paint.

Crayon
Now for some polka-dots!  I thought about making a video for this, but I didn't want to take the time to make a video and figure out all that complicated stuff like how to speed it up at parts.  Maybe I will do that sometime, but for now, pictures will have to do!
Starting at the top left corner, draw a column of evenly spaced polka-dots.  When you've finished one column, go back to the top, and do the same thing, making sure to put each polka-dot right in the middle of two polka-dots on the left.  Does that make sense?  Keep going in this manner until the whole piece is covered.  You can probably tell that my polka-dots are not perfectly evenly spaced.  That's okay, as it should look like it was handmade anyway!  We don't want a card in the end that looks like it was bought in the card aisle.
I did this technique a bit differently this time than I did it the first time.   The first time, I didn't draw the polka-dots over the letters, as much as I was able to keep from it.  I didn't know then that I was going to paint over them later with white acrylic paint, which is why I also filled in the letters with white crayon!  (When crayon is painted over with watercolors, the crayon resists the paint, so the color of the crayon isn't covered with the color of the paint.)
It turns out it wasn't necessary to fill in each letter with white crayon, which makes things so much easier!  So just draw your polka-dots right over those letters!

Watercolor
This is possibly my favorite part.  For the pink piece, I only used one color to watercolor with, but I wanted to use more this time.  I started with turquoise, and then added light blue, and then dark blue.
Color by sections.  I always start in the top left corner, and work my way out from there.  Working quickly, lay down one color, and then wet your brush again, get another color, and color another section.  By section, I mean roughly one inch in diameter, but it shouldn't look like you did it by sections in the end.  You know what I mean?  I never know exactly what a piece is going to look like until I'm done.
After it's all filled in, add more color where you think it's needed.  Try not to mess with it too much though, or it will get muddy-ish and/or the paper will get too soggy.
In the end, it should look diverse, but not so much that it's not smooth.  Smooth like jazz.
Acrylic
So, why wasn't it necessary to fill in the letters with white crayon?  Because we would be covering the crayon up with white acrylic paint!  That makes the crayon pointless.  It's so much easier to use acrylic paint instead of crayons.  It's best to only squeeze out a teeny bit, because this part is fairly time-consuming.  Sorry...you know I can't make a card without doing something kind of complicated and time-consuming!
Unless you can work really fast, I also recommend adding a few drops of water to your paint to thin it down, so it won't dry as fast.  I used my smallest watercolor brush for this part, since I don't have an acrylic brush small and precise enough.  If you do that that too, make sure to rinse it out thoroughly afterwards.  It's good to wet it at intervals anyway.
See how it's kind of messy in this picture below?  That's okay, since you can back over the lines after it's dry with the sharpie you used.  Just be sure not to go outside of the lines, because you can't really re-watercolor that.  Try as much to stay off the lines as possible, because the sharpie may not like to write over acrylic very much.  But it is okay to do that if need be.  I did!
Here it is after getting all fixed up!
I had some leftover acrylic paint, so I painted this little piece.  I'm really happy with how it looks.  Sort of retro-like.
And I also did these, which was just enough to use up that paint!
Alright, now we need to finish that card, don't we?  I gathered a few supplies to match the centerpiece: a graph paper scrap (which I cut to size), two rectangles of thin, brown paper, out of which I cut two circles each to make four circles total, which became a flower (leftovers from this post - remember that?), green and white baker's twine to make a bow, and a rectangle of...thin cardboard?  I also put a dark green eyelet in the center of the flower, but sadly, the bow covers it completely.
I arranged everything as I wanted and the card was done!  Happy Valentine's Day, my lovely people!
You can tweak and personalize this technique in so many ways.  I want to know what you will do with it!