Showing posts with label Ribbon. Show all posts

Saturday, December 10, 2016

How I Wrapped My Sister's Christmas Gift

Have you noticed I've been a little quiet over here lately?  Maybe not, but I have!  It's not that I'm out of ideas, OH no.  Not in the least.  I'm just tight on time and good habits.  That's all.  But guess what!  I just bought my very own computer recently (woot woot!), which means I can spend a lot more time working on blog posts now!  (But does it also mean less time towards school...?  Pssshhh, don't be ridonkulous.)

This isn't exactly a "How-to" post, it's just a "How-I-Did-It" post.  There many ways to wrap a gift, and this is not how I always wrap a gift, of course.  This is simply how I wrapped one gift.

These are the items to be wrapped.  "What?" you say, "But they're already wrapped!"  OH come now.  I am not done!  The remainder of the wrapping will be explained in this here blog post!  (And anyway, there's a good chance the recipient of this gift is reading this, so I'm not going to spoil it for her by showing a picture of the gifts!  You'll just have to be patient, KB.)
I bought a 64-pack of crayons the other day, solely for the purpose of using on gifts!  I found this cool gift wrapping idea recently-ish, and it looks so fun, don't you think?  So I went and got a bunch of crayons, and I'm very excited about them!  Heehee, when I opened up the box, I found this:
So I'm going to tape three crayons on the off-white wrapping.  These are the three I originally picked.
But THEN, I found some more that also coordinated really well with the wrapping.
Look at that!  It's so beautifuuull...
You probably can't read the names very well, but there's "Green," "Forest green," "Lime Green," "Tumbleweed," and "Mauvelous."  Indeed, they are all "mauvelous," aren't they?
I knew I wanted three, and I knew I wanted to keep both the brown color, and the pink color.  So it was just a matter of getting rid of two greens.  But look!  Every one of them coordinates superbly!
In the end though, I stuck with my original three, heh.  I thought the dark green was best because it balances out the light shades of the brown and pink.  After I chose my colors for real, I taped them to the gift, and tied a ribbon around.  This is only the second time I've used this idea of taping crayons to the gift.  For this particular gift, I thought it would look better not to write, "color me" on the gift.  So I didn't.
Now all the inside stuff is done, and the gifts are ready to put into the bag!
After I put them in the bag, I remembered it needed a tag or something.  I know, card making is like my specialty, and I haven't made one in a while, honestly, but I thought what this gift needed was a tag on the outside, not a card on the inside.  (Plus ... I was doing this late at night, and I wanted to finish it up that night.  Making a card would take too long.)

I had this tag on my desk, already made, and it goes perfectly with the colors of the wrapping!  So I took advantage of it.  These were the colors I was thinking about for writing on it.  I really wanted to go with pink, but I knew that was too light, as well as the green.
I decided on the light brown, which turned out to be too light also!
So I went over it with dark pink, which I was not planning on, but it went with the wrapping paper!  I really didn't want to, because it didn't exactly match the ribbon I had already picked out, but neither did the purple sharpie, which is why I didn't pick that to go over the light brown sharpie.
I had gotten the gifts back out of the bag to do the tag, but now they went back in, and it was time to put a bow on the bag!  These are all the ribbons I had been thinking about using.  I wanted to use three, and tie them all together.
These are the three I picked out.  The middle ribbon is the same I used to tie around the off-white gift with the crayons.
The light green was the shortest of the three, but I thought if I cut all three to the same length, I wouldn't be able to tie them in a bow.  Sooo...I thought maybe it would be cool if they were each different lengths!  Well, I was wrong.  It looked pretty bad, in my opinion.  Plus I didn't have a way to attach the tag with this option.
So instead, I ditched the light green ribbon, cut the other two to the same length, and tied a perfect bow, this time attaching the tag!

Note: I find bows look most "perfect" if you tie them upside down.  Like, for this bow, I bent over the gift so my hands were working upside down.
I had wanted to tie both handles of the bag together with the bow, but that didn't really work out with what I did up yonder.  Still, I thought the handles needed to be pulled together in some way.  I still had that light green ribbon, so I thought, "Hey!  I'll use it on the handles!"

But no.  It wasn't working for me.  The fact that it was a different color than the bow with the tag really bothered me.
So I used a small amount of the same green-turquoise ribbon I had used for the bow, and just tied a small knot, not even a bow.  It's inconspicuous, but it does the job. 
All I had left to do was tuck it under the tree!
Even though this is not traditionally Christmas-y, I love how it looks.  In fact, I think I like it more because of that!  I don't really like traditional Christmas colors.  I love Christmas, but not all that red and green and gold jazz.  I hope my seester likes how I did this too!  Haha, sorry for spoiling the wrappage of them, Kay Buff!  At least you don't know what the actual items are though.  :)
 Hey, before I leave you, go check out a guest post I did over at Lisbeth's blog, Running In His Reign!
Poppy Thank You Cards
Do you wrap your presents fancily?  What's the prettiestly wrapped gift you've ever given or received (meaning, how was it wrapped, but you could also tell me what was inside, if you want)?

Saturday, June 18, 2016

How to Put Together a Simple Girly Birthday Gift {For a Girl of Any Age!}


It's almost summer.  Which means, in our family, it's birthday season.  And birthday season means lots of cake.  OH OH and also lots of gifts to give!

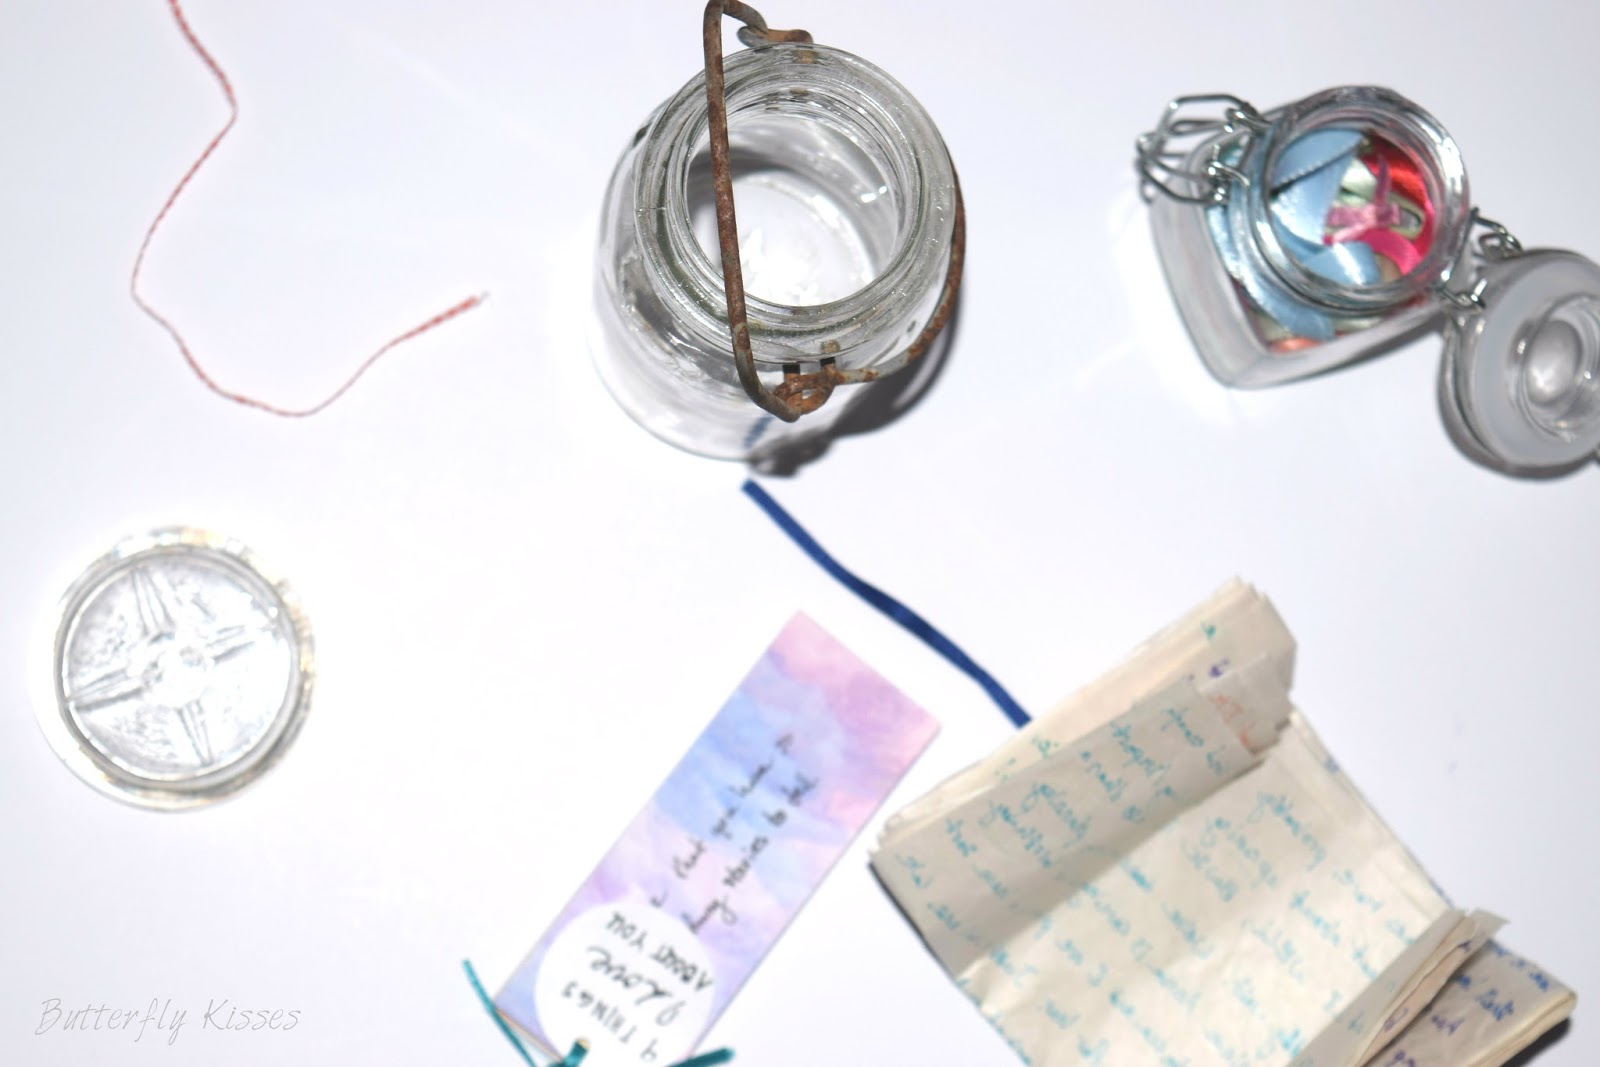
One of my sisters is somewhat hard to get gifts for, so you know what I did?  Well, I went straight to Thinking Outside the Giftbox by Lauren Lanker, and when I was done, I had several ideas to pick from!  I decided to use two, and put them together to make a cute gift in a jar.  Or a glass.  Or whatever you call this cool looking thing that came from a building in our woods.  What do you call it?  (Ooh, and it even has this cool glass top with four points that look like the points of a compass!  Coooool.)
The two gifts I ideas I chose were a "10 Things I Love About You" booklet, and a plain ol' letter, because everyone loves letters!  The "10 Things I Love About You" booklet was not originally Lauren's idea; she borrowed it from Ashley at The Creative Place.  It's such a simple idea, and yet so special!

Instead of using the printable, I decided to just make my own from scratch.  So I painted on watercolor paper, and used that as my "canvas."
I didn't do 10 things actually.  I did 9, only because, with the size of the paper I was using, it worked perfectly to cut it into 9 sections.  There are certainly more than 9 things I love about my sister!
 I hole punched and fancily numbered each one.
Now this is the fun part - writing out what you love about your person!  (JK, all of it is the "fun part.")  Lauren said in her book that the ones she and her husband made for their moms were so specific that they couldn't be said of the other.  That's what I tried to shoot for.  The more specific, the more specialific!
This is the tag I made to attach on the front.  It's just white cardstock and black sharpie.


I have this little jar of ribbon that is just! so! fun!  Actually I have three matching jars of ribbon!  One of them contains lots of thin, pretty, colorful ribbons, and it is where I fetched the beautiful teal ribbon used for the booklet.
You could tie it like this, with a long tail....
 ...Or you could tie it with a pretty bow like this, which is how I ended up doing it.
I wanted the letter to be fun and colorful too, so I wrote it on this cool, wrinkled, old looking paper I had, with all different colors of sharpie.
Since I write long letters, and since I couldn't write on both sides of the paper because the sharpie bled through, the letter ended up being two pieces of paper long.  Which I like.
Now the construction of each of the gifts is completed, and all we have to do is package them up!  That's one of my favorite parts.
I wrapped a ribbon around the letter so it's all nice and compact, and it fits in the jar.
Now, just because the making of the gifts is done, that doesn't mean the making is done!  Time to make confetti!  (That's part of packaging up, right?)  I have these cool fringe scissors that are perfect for this.  I used hot pink, light pink, and light blue tissue paper, and just cut it into about inch-long strips.
Now, just because the confetti making is done, doesn't mean the making is done!  Oh no!  We still have a tag to make for the jar!  Actually though, this tag was pre-made when I put this gift together.  Yes, it was pre-made by me, but still, pre-made.  So all I had to do was punch a hole and write on it.
Out of the same jar of ribbon as I fetched the teal ribbon from, I pulled this pretty green ribbon.  It happens to be the same ribbon I used for The Little Green Bow, if anyone remembers that!
Alright, now the making is finally done, and we can put the gift together!
First I put in the confetti.  Then the booklet and letter went in together, and on top of that, the top!
Don't you just love how old and antique-y this jar looks?
And the top is so cool.
As I said in the title of this post, you could do this for a girl of any age, and she'll love it!  I'm sure you could easily tweak this also to be a good guy's gift.  But...probably only if he's your sweetie or your brother.  Or your dad.

Who, in your life, could you make something like this for?

{P.S. Linking up here!}

Saturday, November 28, 2015

Quick Christmas Craft: Fabric Covered Jar Lid


Believe it or not, Christmas is fast approaching.  Gasp!  Christmas?  Already?  You must be joking!

For realz.  No joke.  I can't believe it either.  But it has come to that time of year again, when some people are starting to get all fancied up for Christmas, and then others...are not.  Because they are wailing in disbelief.  That's what I am doing, in the innermost parts of my brain, but not out loud, or even in my thoughts, really.  I simply haven't been thinking about it too much.  Those times I have thought about it, it blows my mind almost out my ears.  Not quite, but almost.

I heard Christmas music on the radio the other day, for the first time this season.  I was in complete denial.  I am of the opinion that Christmas music SHOULD NOT be played on the radio before Thanksgiving, and actually, not until after Thanksgiving.  Well, that was two days before Thanksgiving!  Uh, not cool, mahn.

My sister has been calling me a scrooge because I don't like Christmas music before Thanksgiving, but the fact is, in our house, we've always been against Christmas music before Thanksgiving!  For realz, why do you need it that early anyway?  I don't get it.  Can't we just get one holiday over with before going on to the next?  Talk about a problem with going-on-to-the-next-thing-before-finishing-the-first-thing syndrome!  (It's gots to be a thing, but I don't know the fancy name for it.  I have it bad.)  Just so you know, I am not a scrooge, but everything in it's own time, right?

Anywho, the point eeyis, Christmas is quickly coming upon us, whether or not we like it (I do love Christmas, but WOWWIE WOO, this year went by fast!).  If you're like me, you'll wait until the last possible minute to get your gifts all ready, because you are a major procrastinator, or, you love Christmas and gift giving so much that you'll get your stuff done right away, except the problem is, you don't know ezackly what to give people, so you'll sit there, waiting to dig in, but you just don't know what to dig in to!

Well, I just may have a solution to both of those problemos.  Enter, fabric covered jar lids!  Not just the lids by themselves, obvs.  A jar with a pretty lid can be a great gift.  Fill it up with hot chocolate mix, or cinnamon sticks (just thought of that off the top of my head!), or simply give empty as a pretty storage jar! These are so easy and fun and quick, that you could make a bunch to give together.  I recommend using either a variety of jars with matching fabric, or a variety of fabric with matching jars.

I am doing a new thing now, which is called, "naming the supplies in list form."  I've never done that.  Not sure why.  But it's probably a good habit to pick up.  Don't hold me accountable to do it every single time though.

Supplees
Jar lid and jar to go under it (I used a salsa jar/lid)
Pretty fabric (not too thick, but thick enough to hide any pattern that might be on the lid)
Sticker Maker
Black sharpie
Scissors
Ribbon (optional)
The idea for this project stemmed from the fact that I have a whole drawer full of fabric.  Okay, not completely full to the brim (I store stuff other than fabric in it), but you know, basically full.  Observe.
The firstest time I did this was with the below jar.  I like the way that it turned out.  I was looking for a way to use some of my fabric, plus make that candle (that's what it is, in case you couldn't tell) look more attractive.  It's my opinion that that green wax is hid'jus.  I was quite happy that I had fabric that matched.  Then I did decide, "Well why not blog on it?  For realz, Maggie!"
Get 'Er Done
First thing is to select your jar/lid of course.  I suppose anything will work; just don't use canning lids.  Make sure to wash the lid before working with it.  This may seem way too obvious, but apparently not to me, because I was thinking at first I would only rinse out the lid.  However, I didn't want it to forever smell like salsa...so I done warshed it.  Even if it doesn't smell like whatever it was used for before, you should still wash it, since it may not be a good idea to wash it after it's covered with fabric.  The jar is not as important to wash now, but when you do wash it before gifting away, make sure to get the sticky stuff from the label off.  I got it off with very hot water and lots of scrubbing.

After selecting which jar and lid you'll use, you'll need to pick a pretty fabric.  If you're using this as a Christmas gift, maybe something red or green.  I didn't purposely use a Christmas-y green for mine, but how convenient that I did!
You don't need much fabric.  Only enough to have at least 3/4 inch around the lid on all sides (depending on how tall the lid is).  Trace around (on the wrong side) with a sharpie or other writing utensil, and then cut out.  Fun fact for your brain: In the picture below, I traced where I thought, at the time, was the right distance from the edge of the lid, but it was in fact, too close.  So I didn't actually cut on that line I'm drawing in the picture.  It's just for show.  Don't do it that close.  Basically, the distance should be about 2-1/2 to 3 times the width of the jar lid.
Now here's something myself hadn't considered: not everyone has access to a sticker maker.  What will we do now?  I suppose the best thing would be to "paint" glue onto the fabric circle with a paintbrush...  I'm a bad blogger for not thinking of a good alternative aren't I?  If you come up with something better than painting with glue, let me know in the comments!  Now that we are past that...I'll just ignorantly assume that everyone does have a sticker maker and move on.  :]  Carefully insert fabric into sticker maker, and turn knob until it starts to come out the other end.  At that point, it might stick to the "teeth," so you'll have to pry it off, which could be (only) slightly difficult, since the sticker maker manages to make things quite sticky.  You can do eet!
Now is the actual tricky part, assuming you do indeed have a sticker maker.  You have to get the fabric off the wax paper stuff that it's stuck onto at this point.  This can be very difficult, so try not to let much of your fingers touch the stickiness.  Because you can never again free them!  Never!*  It can also be difficult because the sticky stuff doesn't take a liking to fabric (what does it have against fabric?), so it tends to come off easily, so you have to kind of keep pulling the fabric up and and putting it back down over and over again until the stickiness stays on the fabric.  It really is not that hard once you get the hang of it.  Do it all around until you're able to pull up the whole piece, and then gently lay the whole piece down on your working surface, sticky side up!
*Just kidding.

After that, it's all truly fun, quick, and easy!  Gently lay the lid down in the center.  Don't worry if it's not exactly in the middle, just make sure there's enough room all around to wrap around the edge, and then inside.  Which is the next step!  Start by sticking the fabric up on the edge on two opposite sides (east and west), and then do it again on another two opposite sides (north and south).  Do that until it's stuck on the sides in eight or more spots.  Then stick down the fabric on the inside in two opposite spots, and eventually all around, in the same fashion as you stuck it up on the edge.  Or, you could go clockwise around in this part.  Whatever you do, make sure you stick the fabric down in every spot in a way so that there's stickiness in every spot, so it'll actually stick there.  (Did that make sense?  Heehee, try saying that ten times fast.)  The lid should still be able to screw onto the jar.
And you're done!  If you want to make it look even more fashionable, tie a pretty ribbon around the neck of the jar, and gift away to someone special!

This was before tying on a pretty ribbon.  The lid reminds me of a beret!
Pretty ribbon to the rescue!
I love the way the glass looks in this picture.
Somehow, I managed to make this incredibly easy activity look long and complicated by my abundance of words.  Hopefully you can still see how this is a quick and easy activity!

What would you fill the jar with?  How could you personalize this?