Showing posts with label Birthday. Show all posts

Tuesday, October 25, 2016

GOMO // 12 Ideas to Get You Walking

Eventbrite, the largest self-service ticketing platform out there (!) coined the new term, "Go Out More Often," abbreviated "GOMO," made up to counteract this other term, "Fear of Missing Out," abbreviated (betcha can't guess) "FOMO."

I don't have any, like, any (ANY) desire to go out more often, and I can't relate to this fear of missing out that people seem to have.  I've got lots of school to do these days, and when I'm not doing school, I'd like to be all nicely cooped in my house doing crafty thangs.

BUT, I do enjoy a good walk now and then, so when I started brainstorming a list of ideas, I actually got really excited about the idea of going out more often, if only to go on a walk!  Perhaps you could use Eventbrite's event management software to host your own walk of sorts, like a charity event or something!
Many people who write posts for EventBrite put "Go on a walk" as one of their listees.  I decided to  go all out with that one option.  I tried to make all of these ideas free of the need to spend any money.  However, many of these, if not all, require a good bit of time.  Also, most of these would be best done someplace with many people, and like, in a cool dowtowny place.  As I made the list, I kept thinking of downtown Wake Forest near us.  It would be so much fun to tramp around there!
Sooo, here is a list of all sorts of different walks you could go on to Go Out More Often!
  • Scavenger Hunt >> Come up with a list of things to look for, based on where you're walking, and check them off as you find them!
  • Word Search >> Come up with a list of words to find, words you would expect to see where you're going, and some you wouldn't expect.  Bonus if you can find words you didn't expect to see!
  • Talk to Total Strangers >> Come up with a list of random and silly questions, and then go to town or somewhere with many people, and ask random people your random questions!  And then give them candy or something for their participation.
  • Random Acts of Kindness >> This isn't specifically a walk, but I mean, how can you do this without walking some?  Honestly, this idea kind of scares me a little.  I'm like, "You said what now?  You want me to advance out of the regions of my comfort zone and talk to people - total strangers (again)?!"  But it's a very good thing to be kind to everyone all the time anyway, and this is an opportunity to share the love of Christ!
  • Hide-and-Go-Seek Walk >> This would be a good option if you have four or five people.  Together, plan your route, and then everyone except "it" will hide somewhere along the route.  (It might be a good idea to have everyone meet at a certain place after some amount of time.  You don't want to seek for too long!)
  • Not Halloween Walk >> We've never done Halloween, and I'm totally cool with that, but I still really like the idea of giving out candy to total strangers (especially kids, but I digress).  So, carry around a bucket or basket of candy (or homemade cookies?), and randomly give it away!  Even better, do this sometime not around Halloween or the holiday season!
  • Christmas Light Sightseeing >> Crazily, Christmas is not that far away, and pretty soon, Christmas lights will start to appear!  If you live in or near a neighborhood where lots of people decorate for Christmas, take the opportunity to walk (or drive) around and look at them all!
  • Make Someone Else Go On a Walk >> This would be a fun birthday surprise!  Arrange for a friend to arrive (notice I did not say meet) at a specific location.  Before they come, grab some sticky notes or small pieces of paper and tape, and put them up around, on light poles and the like, with directions on each for where to go next, or maybe just arrows!  Where the friend first arrives should clearly be the starting point, and the last should clearly be the end point.  At the end, have some little (or big) surprise for the person.
  • Color Walk >> Make some sort of chart (or not!) and tally how many times you see each color, and then make something using however many swatches of however many times you saw each color.
  • Shop Hop >> Bar hopping is where you "hop" from bar to bar, so shop hopping is "hopping" from shop to shop.  You don't even have to spend money if you don't want to!
  • Draw Your Journey >> As you go along, draw any interesting, or not interesting, places you see, and label what place it is.  You could also photograph, but to me, drawing sounds better for this.
  • Night Walk >> Need I say more?  Try to do it on a really light, bright night.
And there you have it!  Which of these will YOU try out?

Saturday, June 18, 2016

How to Put Together a Simple Girly Birthday Gift {For a Girl of Any Age!}


It's almost summer.  Which means, in our family, it's birthday season.  And birthday season means lots of cake.  OH OH and also lots of gifts to give!

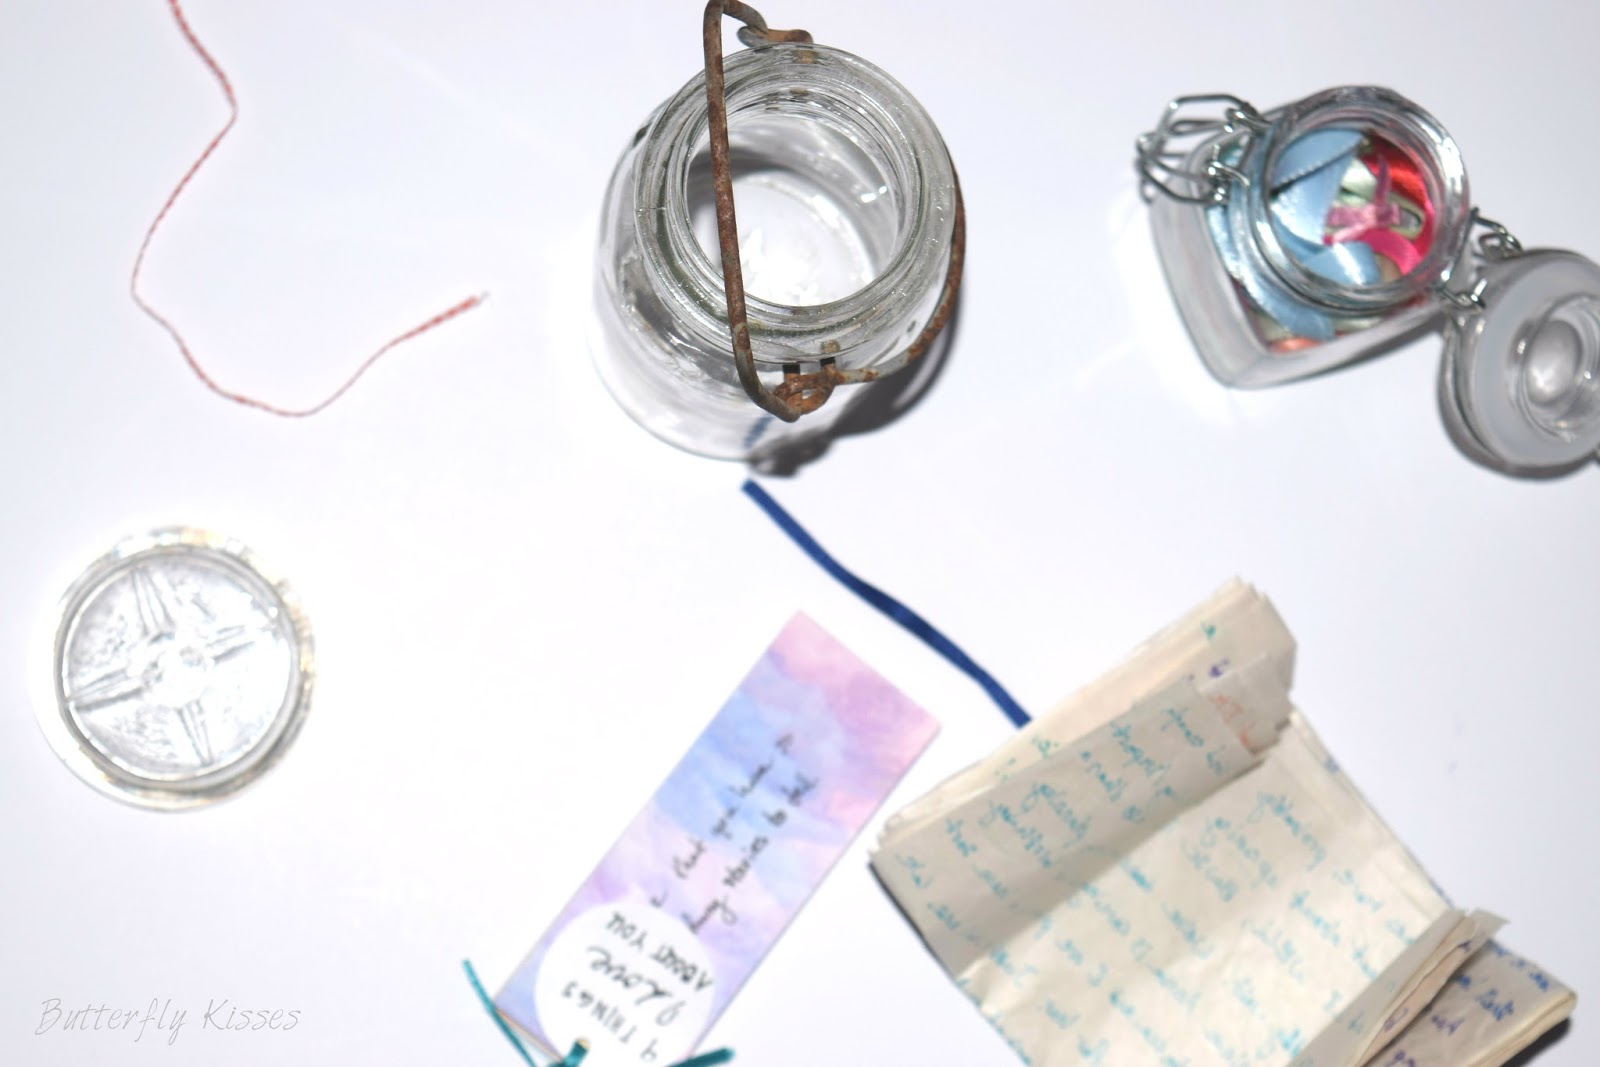
One of my sisters is somewhat hard to get gifts for, so you know what I did?  Well, I went straight to Thinking Outside the Giftbox by Lauren Lanker, and when I was done, I had several ideas to pick from!  I decided to use two, and put them together to make a cute gift in a jar.  Or a glass.  Or whatever you call this cool looking thing that came from a building in our woods.  What do you call it?  (Ooh, and it even has this cool glass top with four points that look like the points of a compass!  Coooool.)
The two gifts I ideas I chose were a "10 Things I Love About You" booklet, and a plain ol' letter, because everyone loves letters!  The "10 Things I Love About You" booklet was not originally Lauren's idea; she borrowed it from Ashley at The Creative Place.  It's such a simple idea, and yet so special!

Instead of using the printable, I decided to just make my own from scratch.  So I painted on watercolor paper, and used that as my "canvas."
I didn't do 10 things actually.  I did 9, only because, with the size of the paper I was using, it worked perfectly to cut it into 9 sections.  There are certainly more than 9 things I love about my sister!
 I hole punched and fancily numbered each one.
Now this is the fun part - writing out what you love about your person!  (JK, all of it is the "fun part.")  Lauren said in her book that the ones she and her husband made for their moms were so specific that they couldn't be said of the other.  That's what I tried to shoot for.  The more specific, the more specialific!
This is the tag I made to attach on the front.  It's just white cardstock and black sharpie.


I have this little jar of ribbon that is just! so! fun!  Actually I have three matching jars of ribbon!  One of them contains lots of thin, pretty, colorful ribbons, and it is where I fetched the beautiful teal ribbon used for the booklet.
You could tie it like this, with a long tail....
 ...Or you could tie it with a pretty bow like this, which is how I ended up doing it.
I wanted the letter to be fun and colorful too, so I wrote it on this cool, wrinkled, old looking paper I had, with all different colors of sharpie.
Since I write long letters, and since I couldn't write on both sides of the paper because the sharpie bled through, the letter ended up being two pieces of paper long.  Which I like.
Now the construction of each of the gifts is completed, and all we have to do is package them up!  That's one of my favorite parts.
I wrapped a ribbon around the letter so it's all nice and compact, and it fits in the jar.
Now, just because the making of the gifts is done, that doesn't mean the making is done!  Time to make confetti!  (That's part of packaging up, right?)  I have these cool fringe scissors that are perfect for this.  I used hot pink, light pink, and light blue tissue paper, and just cut it into about inch-long strips.
Now, just because the confetti making is done, doesn't mean the making is done!  Oh no!  We still have a tag to make for the jar!  Actually though, this tag was pre-made when I put this gift together.  Yes, it was pre-made by me, but still, pre-made.  So all I had to do was punch a hole and write on it.
Out of the same jar of ribbon as I fetched the teal ribbon from, I pulled this pretty green ribbon.  It happens to be the same ribbon I used for The Little Green Bow, if anyone remembers that!
Alright, now the making is finally done, and we can put the gift together!
First I put in the confetti.  Then the booklet and letter went in together, and on top of that, the top!
Don't you just love how old and antique-y this jar looks?
And the top is so cool.
As I said in the title of this post, you could do this for a girl of any age, and she'll love it!  I'm sure you could easily tweak this also to be a good guy's gift.  But...probably only if he's your sweetie or your brother.  Or your dad.

Who, in your life, could you make something like this for?

{P.S. Linking up here!}

Wednesday, April 20, 2016

The Doodle Card

Wow, it's been a while since I did a card tutorial here, hasn't it?  (We're not counting that guest post I did, since it wasn't for my own blog.)  I whipped up one of these cards Sunday before last when I needed to make a birthday card for someone in a short amount of time, and I didn't want to go to the trouble of thinking up a fancy card.
I like this card because it is so easy, and can take five minutes to complete, depending on how detailed you get!

Supplees
Three blank cards (this is the paper I use)
Three card panels the same size as the cards
Black sharpie pen
Glue


Directions
Doodle on card panel.  Glue to card.*

*The reason I say to do this on a separate piece of paper instead of right onto the card is simply that the sharpie bleeds through the paper.  If you have thicker paper (the weight of mine is 110), you certainly don't need a separate card panel to doodle on.

Sometimes a blank surface can be daunting, but just go ahead and make a mark!  The point is to doodle.
Since it can be intimidating to start on a blank surface, I'm all prepared with tips and ideas to get you started!  If you can't think of what to doodle, here are some ideas.

Circles
I like to draw circles inside circles, but you could also just draw empty circles.  You could try going from small to big, or completely random!
I also like to draw stripes inside my circles' circles..
Dots
I did dots in a swirly design, which I think looks nice.  You could also do lines with dots, or just random dots.  I think it looks good to have them in some sort of pattern.
Squares
For the original card (pictured up yonder^), I loosely drew rows of squares of varying sizes, like in the picture below.  I like to do a biggish area full of squares.
Triangles
This is something I did on only one of the cards, and don't like the look of as much as squares.  It is still nice though, and maybe your style involves more triangular things, and that is okay!
Lines
Lines!  Possibly the easiest pattern to do, and so pretty if you do it right!  HA.  What does "right" even mean?  Maggie knows not.  You can also criss-cross them and make a checkered pattern or plaid.

Sentiment
This is of course optional.  Not every card needs words, but if you need/want words, go for it!  Since these cards are a little wonky, I recommend writing it in wonky handwriting!
And there are some ideas for you to implement on your own cards!  There are so many more possibilities than what I listed.  Go where your mind takes you!  Or, as I put it in the first picture, let out the creative kid inside you!  I'm all about being a kid.
I gave you ideas for what to doodle, and now I'll give you tips as to how to doodle too.

Balance your lights and darks.
If your pattern at one end of the card is light, try to maintain that light throughout.  If you start out dark, keep it dark. In the first card (pictured below), I had more darks on the bottom half of the card, so I added in stripes to a row of squares at the top to even it out a little bit.
Repeat patterns.
For instance, take my squares.  I had squares in the top of the design and then again down at the bottom in the first card, and throughout on the last.  For the second card, I drew triangles on the bottom and top, as well as down the left and right edges.
Try not to get too busy.
It's my humble opinion that I got a little too busy on the second card.  You may think differently on what's busy and what's pleasing to the eye.  Of the three, I think the first is my favorite because I like the swirly-ness, and the last is almost too open for me.
Play around.
This is about doodling, right?  Play with patterns.  Trace your hand (now that's a good idea!)  Draw circles or lines over and over again, if that's all you can think of. Just don't overthink it.
Lately I've started calling people Honey Bun, in addition to Honey, Hun, Darlin', and the like.  So that's the explanation for the "What's up, Honey-bun?" card.  :)
I love that these can be all occasion cards, and could totally be for a girl or a boy, depending on the patterns you employ!
There SO many possibilities with this card.  It'd be fun to play around with a bunch and see how many different designs you can come up with.
Will you give it a try?  What is your favorite pattern to doodle?  Do you even like doodling?  I think it's great fun.

Saturday, February 13, 2016

Although I Don't Like the Number Four...

Although I don't like the number four, it seems I can't get away from it at times.  This post will feature four different mediums that will all be combined on one card.

Remember how I hinted in my last post about an upcoming post that I was super excited about?  Well guess what.  IT'S HERE.
Now, I am fully aware that this might not be as exciting for some of y'all as it is for me.  Fully aware, meaning, I am keeping that as a possibility in my brain, whether or not I understand how that could be the case.

Granted, I get excited quite easily about cool artsy techniques, but I am hoping that SO DO YOU!  Because this technique is really cool.
Watercolors lately have been one of my many loves.  Not for painting pictures with so much (though that is lovely too), but simply for painting pretty little background/centerpieces to use on cards.  This pink piece specifically is something I made a couple weeks ago, to use on a Valentine's Day card (which I still have not done).  It was my first time combining all four mediums like this, and I was so happy with the result that I had to try it again and show y'all!


Sharpie
Here are the first two mediums we'll be using.  A sharpie and a crayon, in the colors shown, but of
course you can use whatever colors your heart desires!  OH HEY.  I has a question called: can writing utensils even be called mediums?  I feel like they're not supposed to be called that, but I've been doing it, and I do believe I will continue.  Because I am a rebel like that.  (Tell me in the comments whether or not you think it's okay.  I'm curious.)


So, obviously, since we'll be using watercolors later, you'll need to be working on watercolor paper.  I used a smallish piece, like half the size of a card, but the size doesn't really matter.

I wrote "Happy Birthday" on mine because I needed to make a bunch of birthday cards, and in my opinion, birthdays trump Valentine's Day.  I would have done Valentine's Day if I didn't need to make a birthday card instead.  I'm thinkin' this would be super cute for Valentine's Day though.  You should try it and show me your beautimous work.
I was intending at first to write it basically the same curly way as the pink piece, but apperently, my hand had other ideas. So this is what happened.  You can do any font you like; just make sure your letters are wide enough so that you can paint inside them later with acrylic paint.

Crayon
Now for some polka-dots!  I thought about making a video for this, but I didn't want to take the time to make a video and figure out all that complicated stuff like how to speed it up at parts.  Maybe I will do that sometime, but for now, pictures will have to do!
Starting at the top left corner, draw a column of evenly spaced polka-dots.  When you've finished one column, go back to the top, and do the same thing, making sure to put each polka-dot right in the middle of two polka-dots on the left.  Does that make sense?  Keep going in this manner until the whole piece is covered.  You can probably tell that my polka-dots are not perfectly evenly spaced.  That's okay, as it should look like it was handmade anyway!  We don't want a card in the end that looks like it was bought in the card aisle.
I did this technique a bit differently this time than I did it the first time.   The first time, I didn't draw the polka-dots over the letters, as much as I was able to keep from it.  I didn't know then that I was going to paint over them later with white acrylic paint, which is why I also filled in the letters with white crayon!  (When crayon is painted over with watercolors, the crayon resists the paint, so the color of the crayon isn't covered with the color of the paint.)
It turns out it wasn't necessary to fill in each letter with white crayon, which makes things so much easier!  So just draw your polka-dots right over those letters!

Watercolor
This is possibly my favorite part.  For the pink piece, I only used one color to watercolor with, but I wanted to use more this time.  I started with turquoise, and then added light blue, and then dark blue.
Color by sections.  I always start in the top left corner, and work my way out from there.  Working quickly, lay down one color, and then wet your brush again, get another color, and color another section.  By section, I mean roughly one inch in diameter, but it shouldn't look like you did it by sections in the end.  You know what I mean?  I never know exactly what a piece is going to look like until I'm done.
After it's all filled in, add more color where you think it's needed.  Try not to mess with it too much though, or it will get muddy-ish and/or the paper will get too soggy.
In the end, it should look diverse, but not so much that it's not smooth.  Smooth like jazz.
Acrylic
So, why wasn't it necessary to fill in the letters with white crayon?  Because we would be covering the crayon up with white acrylic paint!  That makes the crayon pointless.  It's so much easier to use acrylic paint instead of crayons.  It's best to only squeeze out a teeny bit, because this part is fairly time-consuming.  Sorry...you know I can't make a card without doing something kind of complicated and time-consuming!
Unless you can work really fast, I also recommend adding a few drops of water to your paint to thin it down, so it won't dry as fast.  I used my smallest watercolor brush for this part, since I don't have an acrylic brush small and precise enough.  If you do that that too, make sure to rinse it out thoroughly afterwards.  It's good to wet it at intervals anyway.
See how it's kind of messy in this picture below?  That's okay, since you can back over the lines after it's dry with the sharpie you used.  Just be sure not to go outside of the lines, because you can't really re-watercolor that.  Try as much to stay off the lines as possible, because the sharpie may not like to write over acrylic very much.  But it is okay to do that if need be.  I did!
Here it is after getting all fixed up!
I had some leftover acrylic paint, so I painted this little piece.  I'm really happy with how it looks.  Sort of retro-like.
And I also did these, which was just enough to use up that paint!
Alright, now we need to finish that card, don't we?  I gathered a few supplies to match the centerpiece: a graph paper scrap (which I cut to size), two rectangles of thin, brown paper, out of which I cut two circles each to make four circles total, which became a flower (leftovers from this post - remember that?), green and white baker's twine to make a bow, and a rectangle of...thin cardboard?  I also put a dark green eyelet in the center of the flower, but sadly, the bow covers it completely.
I arranged everything as I wanted and the card was done!  Happy Valentine's Day, my lovely people!
You can tweak and personalize this technique in so many ways.  I want to know what you will do with it!