Showing posts with label Eyelets. Show all posts

Friday, July 29, 2016

Make a "Things I Love About Coffee" Card


Long ago*, on a Google+ post, I was once told, "you need to make that into a card ASAP."*  Referring to:
via
*October 1, 2015
**Yes, I actually went and found that particular post on Google+ where that was said to me, so that I could type the words verbatim.  Which is why I also know the exact date of the transaction.

To which I replied that I would think about it, even though I don't drink coffee.  And so I did!  For nine months, I thought about it, until I finally made it a few weeks ago!

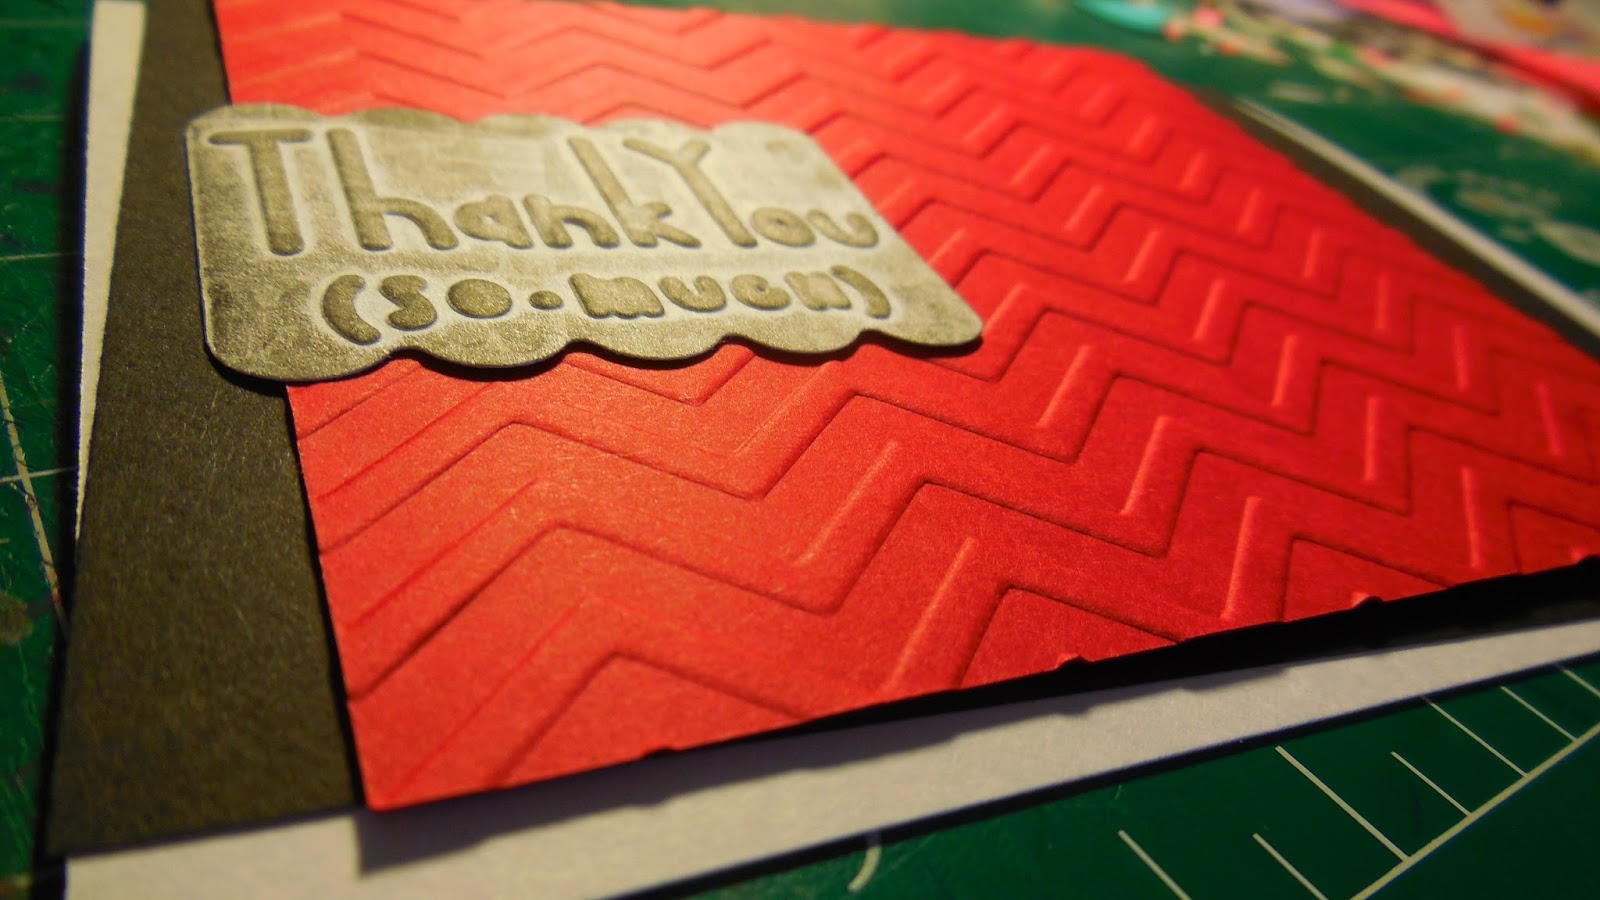
Of course, I didn't make it exactly like the original work, because, well, I don't know how?  Or I can't let myself make something the same as another has already made it?  What can I say?  I'm an artist.  I like to "make it my own," as people say.

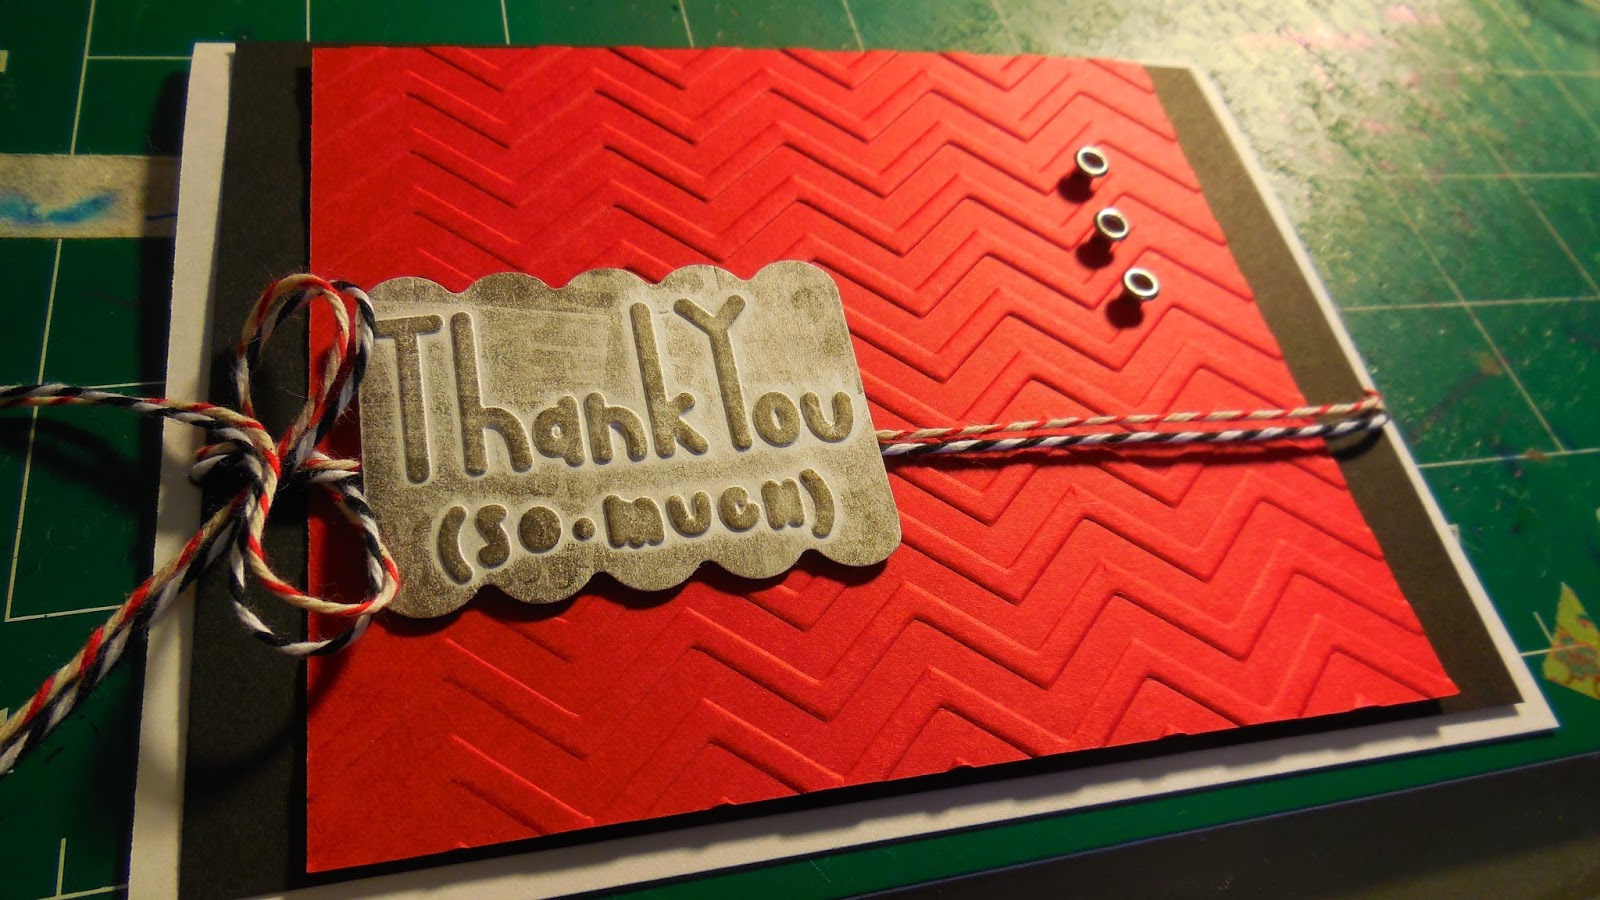
Supplies for My Card
White cardstock card, roughly 7 inches tall by 4-1/4 inches wide
Slightly smaller piece of white cardstock
Lined paper (to copy)
Extra fine black Sharpie
Three mugs stamp (any mug stamp would work, or simply draw a mug, as in the original)
Black stamp ink
Brown stamp ink
Doily (can't get away from 'em!)
Silver eyelets
Now, all that looks like an awful lot of supplies.  I make things complicated like that.  But you can see from the original, that it really is not that complicated.  So, if you want, here are the supplies for the original card.

Supplies to Make the Original Card (Which Happens to Be Much Easier)
White cardstock card, same size as mine
Lined paper (to copy)
Extra fine black Sharpie

Wow.  So much shorter, amiright?  But I'm here to tell you how I made the card, not how to easily and quickly make it, like the original!  (Two totally different matters, you see.)  So let's get on wit' it.

You see the lined paper in the above picture?  I wanted to have lined paper in the card, because that's what the original had, so I copied a piece of lined paper onto a piece of cardstock, and made sure it printed in black and white.

But, alas, I was not satisfied.  For some reason...I didn't like that it was so...straight!  (Strange, for the OCD-ish person that I am.)  So, I re-copied it, but this time, I crookedinized (totally a word) the lined paper in the machine, so it printed out crooked!  (Note: to make it even better, you could crumple it up and then flatten again before copying.  I didn't even think of that when I was making it.)

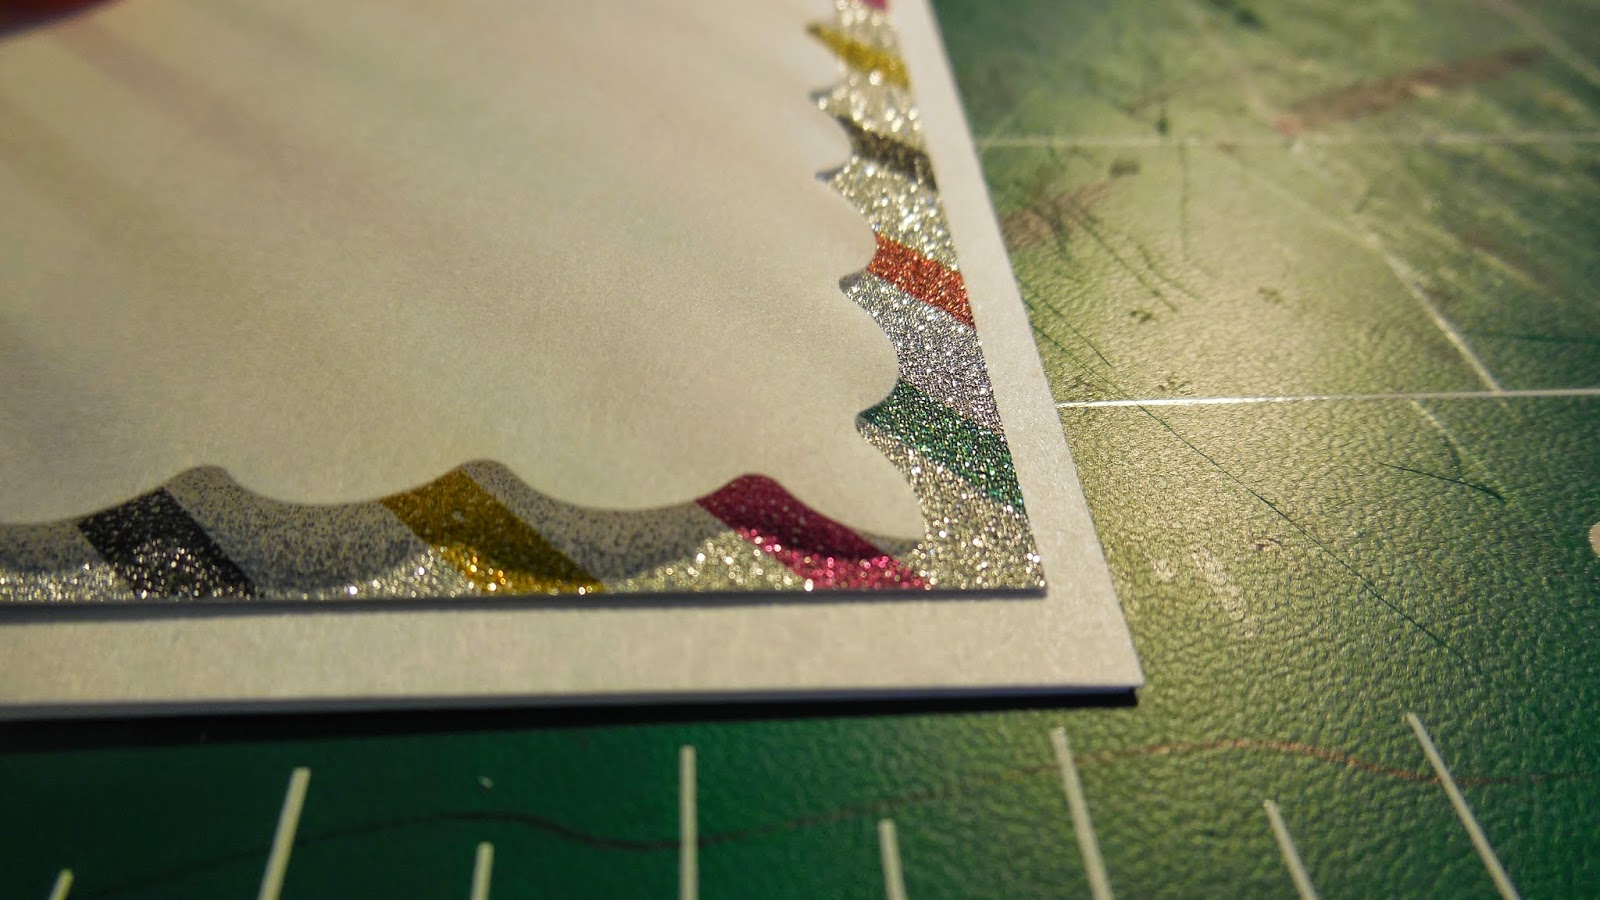
Then I cut out a piece of the lined cardstock, just a wee bit smaller than the card base.  At the top, I wrote, "THINGS I LOVE ABOUT COFFEE."
This is the scribbled list of things to love about coffee, that I copied from the original.
Using the list, I wrote each point on the card, along with, "THINGS I LOVE ABOUT YOU" down at the bottom!
I didn't care if I messed up, since it was supposed to look all hand-written and stuff.
Here's the mug stamp and the black ink I used.
I inked it only partway, because that's all I would need at this point.
Then I stamped it down in the open area near the bottom right corner, and also up in the top left corner, after I inked the other side of the stamp.  Make sure to have a piece of scrap paper underneath when stamping off the edge like this.
And then I stamped the heart stamp in black in the top right corner, left middle-ish, and bottom right-ish.  I also re-stamped the hearts in brown, over top the black hearts.
That's when I realized that I missed the "coffee" in the second point.  I freaked out a little in my brain at first, but then I remembered:  It is okay.  And I just added it back in with an arrow!
Now it's time to use another doily!  To make this doily brown, I just rubbed it all over with my brown ink pad.  Usually it annoys me that it's such a light brown, but it worked spiffily for this!

Line it up along the top right edge, and with the edge of your scissors, score a line along the edge of the paper.  That's where you'll cut it.
Do the same for the bottom left corner.
Now all we need to finish up this card is a few eyelets!  I used eight silver eyelets in all.
Punch the holes, insert the eyelets, glue the panel onto the card base, and you're done!
I thought it looked a little busy, and still think that, but again, I'm deciding not to worry about it.  Can you think of any other points that could go on this card?
Wouldn't this be adorable to send to a coffee lover?  Do YOU like coffee?  How do you like to drink it?

P.S.!  Ooh, I am sooo so so excited about this!  Jennie Moraitis' PAPERBACK book, The Creative Retreat, is out, and I was SO excited to find it waiting for me in its pretty pink package when I got home from camp!  And do you know what's exciting about it?!  (Many things, but one of them is this.)  I'm IN it!  I am so honored to know Jennie enough  that she would ask me to be a contributor to her book.  Learn more about the book HERE!

Friday, September 25, 2015

The Bold Red Card: You Made It Happen!

Sooo, last time, I gave y'all five choices to pick from, and option #5 got the most votes out of them all.  I'm sorry I'm two days late to get this post out, by the way.  You know, school sort of gets in the way.

I'll tell you a little bitty tiny secret: I was rooting for that one all along!  Now I'll tell you another secret, which in fact, is really not a secret.  At first I only had four choices, and was going to only use those, but you may know that I hate the number four, and so I just couldn't bear to have only four choices.  So I tried and tried for a good while to come up with a fifth choice, but it wasn't happening!  Finally I had almost given up, but I decided to take a break, and then come back.  And guess what!  After stretching my brain to it's uttermost end, this brain in this head finally thought of one more option, and it turned out to be my favorite.  At that point, I considered simply doing a blog post on that one, but I had already thought of letting y'all choose, and anyway, I liked the other choices too, so I went with the poll.  Nevertheless, I'm glad the last one got picked!

Before I show you the finished card, I'll just walk you through a short tutorial of how I made it up to this point.

I first started with a 5 and 1/2 by 4 and 1/4 inch card, as always, folded on the long side.  Then the black piece is 5 and 1/4 by 4 inches, and the red is 3 and 7/8 by 4 and 1/2 inches.

The "thank you" piece is a scrap that I had been looking for a use for, but was having trouble with.  It's a little bigger than 2 by 1 and 1/2 inches.  In case you're wondering, it was made by embossing a white piece with one of my Thank You embossing folders from Lifestyle Crafts (I couldn't find a link to put in so y'all could see what I'm talking about), and then I ran over it with my rubber brayer in black ink, which had already run over something else, so the ink wasn't so thick when it went over the thank you piece.

By the way, I'm sorry if the red here is overly bright, and looks sort of orange-y.  In real life, it's a deep, dark red, and not at all orange.  Deep colors are the best.
Emboss the red so that the chevron goes horizontally.  I used this one.
Then it was time to put the string on!  I used both red (which I'd never used before) and black.  You should cut two of each color, measured to 5 and 1/2 inches.
To make it look the best, I aligned the string with the corners on the chevron on the left.  After that, the eyelets went in on the right, and then the thank you piece in the middle.
Ta daaa!

Wednesday, September 16, 2015

Five Options... Which Will You Choose?

That title is suppose to look all ominous and stuff.  Me thinks it does not.  But on to the post!

Sad face.  Maggie didn't make any cards last week.  Or this week.  At all.

What?  No cards at all for a week and a half or more???  Shame on me, I know.  But guess what!  You, yes you, my dear reader, get to help me make one soon!  (Woot woot!)


This card has been sitting on my desk, half finished, for possibly weeks.  I haven't quite decided how to finish it.  But I was playing around with it the other day, thinking of different options I might go with, and then I had this super idea to let y'all choose what to do!  This will be so fun!

Okay, so maybe it won't be the highlight of your day or whatever, but please admit you'll get some enjoyment from it.  Please? Yay!

In an upcoming post, I'll show you a brief tutorial on how I made the card up to this point, and then I'll show you the finished card, so keep your eyes open!

And, here are your choices!  Vote away (over there on the right)!  The poll will be open until September 23, at midnight.  Hopefully that's plenty of time!

Note: Since I don't yet know which style I'm going to make, I didn't know what length the string would have to be cut to.  That means that when photographing each card idea, the string was still attached to the spools, and I didn't try to tie the knots and bows as well as I would for the actual card.  So if you see strings going off the card in an unnatural way, just know that it shouldn't look like that when I make the card later.  Also, I may tweak or change things a bit after y'all have picked which card style I'll use, but it will stay basically the same.

Again I say, get voting!
Option #1
Option #2
Option #3
Option #4
Option #5

Thursday, May 14, 2015

Glitter Flowers

Unlike a certain sister of mine, I do not really care for glitter.  However, I received some glittery paper for Christmas, and I am not one to waste good paper.  What I especially liked about this paper was that all the glitter stayed on the paper, and did not get all over my hands and everything else in the vicinity!  I'm used to glitter getting everywhere when it's used, so I was quite pleased that this did not do that.  Because of that, I actually kind of like the way this paper looks with the glitter.
This will be used for the background.  I wanted something out of the ordinary (as in, something other than a pretty blue sky), and I really like the way this looks behind the vellum in the finished piece.
This is for the bigger of the two flowers, which we are about to make.
If I had differently sized scallop circle punches, I would use them.  I could even buy some!  (What a novel idea!)  But I rarely buy things, and isn't it so much easier to simply find something round and trace around it, cut it out, and then cut around it with the squiggly cut on your paper cutter, even though it won't make a scallop circle, it will instead make a squiggly edged circle, and therefore won't look as good as a scallop circle?
Well, no, that might not be easier, but that's what I did.  I'm not going to go to the trouble of driving to a craft store just to buy something like that.  Well maybe I would.  But I haven't.  ANYWAY, this picture is the circle after I cut it out.
This is the squiggly blade on my paper cutter.  I don't use it very often, but it's always fun when I do.  That really isn't saying much, though.  I usually enjoy whatever card-making tools I use while making cards.
I decided to test it on a scrap piece before I went around the real thing.  As you can see, it didn't work all that well, but I thought I would be able to make it right for the glitter piece.
The blade didn't cut all the way through, so I had to go around it with my knife.
...Which is what I'm doing here.
Unfortunately it didn't work even the second time.  But hey!  Who says it has to be perfect?!  Me.  I said it has to be perfect.  Oh well.  I will survive.  Oh as long as I know how to love I know I'll stay alive.  I will survive.
There, that one's better.  Actually I trimmed the edge a little so it was the right shape.
It took me a little while to find something the right size to trace around for the vellum center of the smaller flower but I finally settled on the cap of my extra fancy stainless steel sharpie.  It's bigger than the other sharpie caps.
I went around it with pencil, then cut out.
Here are both glitter pieces with both vellum centers.  The diameter of the bigger center is about an inch.
Punch a hole in the center of each flower with eyelet punch.
You may not be able to tell here, but the eyelet on the left in this picture has not been punched out at all yet, while the one on the right has been punched out, just once.  To do the string part, as we will in the next steps, you need to punch it out once, like the right eyelet is.  As you, hopefully, can see, that one spreads out a little at the top, while the left one goes inward.  That way, you can wrap the string around it with out it coming out of the hole.
These are left over from my last post.  They're all different lengths, ranging from, like, 3 inches, to around 5 probably.
I found that it's easiest to get tie it onto the eyelet if you first loosely tie it like this, and then sort of hook it on.
See how there's space to hook it on?
Pull down...
...And tie tightly.
I used a longer piece for the bigger flower, and a shorter piece for the smaller flower.
This has been in the background of some of the earlier pictures, but we didn't need it until now, so that's why I'm just now introducing it.  In the card from my last post, I was originally going to overlay the patterned paper with this piece of vellum, which is the exact same size as that piece was.  I decided not to do that, however, so I'm using the vellum for this instead.
This picture is simply to show you how we're going to layer ever'thin'.
Ahh, looking at that "thanks" makes me happy.  So uniform and perty.  I did those leafy things with a pale green sharpie.  They make me happy too.
OOH!  Colored staples!  Have you ever heard of such a thing?!  I hadn't heard of them, but I recently-ish I was thinking about them for some reason, and I thought to myself, "Hmm!  I bet those things exist!"  And so they do!
I went around the edges, doing three staples on the bottom and top, and five on the left and right.
I've had experience with two kinds of staplers - the kind that makes the staples flat on the back, and the kind that makes them stick up in the back.  I have the latter, as you can see.  Because of that, the paper wouldn't lay down flat when I put the glue on.
Soo...with my corner rounder, I sort of hammered them all down.  It took a while and was kind of difficult...and frustrating, so hopefully you have the other kind of stapler.
After I flattened the backs of the staples, I decided the paper was too...not porous enough for the glue to really work, so I put it through my sticker maker.
This is what it looks like after going through the sticker maker.
There - now it's all nice and flat.
I also put the flowers through the sticker maker, since, of course, they were made of the same paper, so glue wouldn't work on them either.  Because the strings hang over the edge, I tucked them under the vellum while they went through the sticker maker.  That way they didn't get sticky stuff on them unnecessarily.